

Launch Your Academy
Launch Your Academy
Section titled “Launch Your Academy”You have installed Learnomy and activated it. This page is the running order from that moment to a real course that a real student can buy, finish, and get a certificate for. Work through the eight steps below once, in order, and you will have proved every part of the chain yourself rather than finding out from your first customer.
The other pages in this section each cover one screen in depth. This page is the sequence. Where a step has its own page, follow the link and come back.
What you can do
Section titled “What you can do”- Get from a fresh install to a published, priced course in one sitting.
- Catch the two failures that break a launch quietly: a URL another plugin already owns, and email that WordPress reports as sent but never delivers.
- Buy your own course as a student, using the Test Gateway, before any real payment key exists on the site.
- Confirm enrollment, completion, and the certificate as the student sees them, not as the admin assumes them.
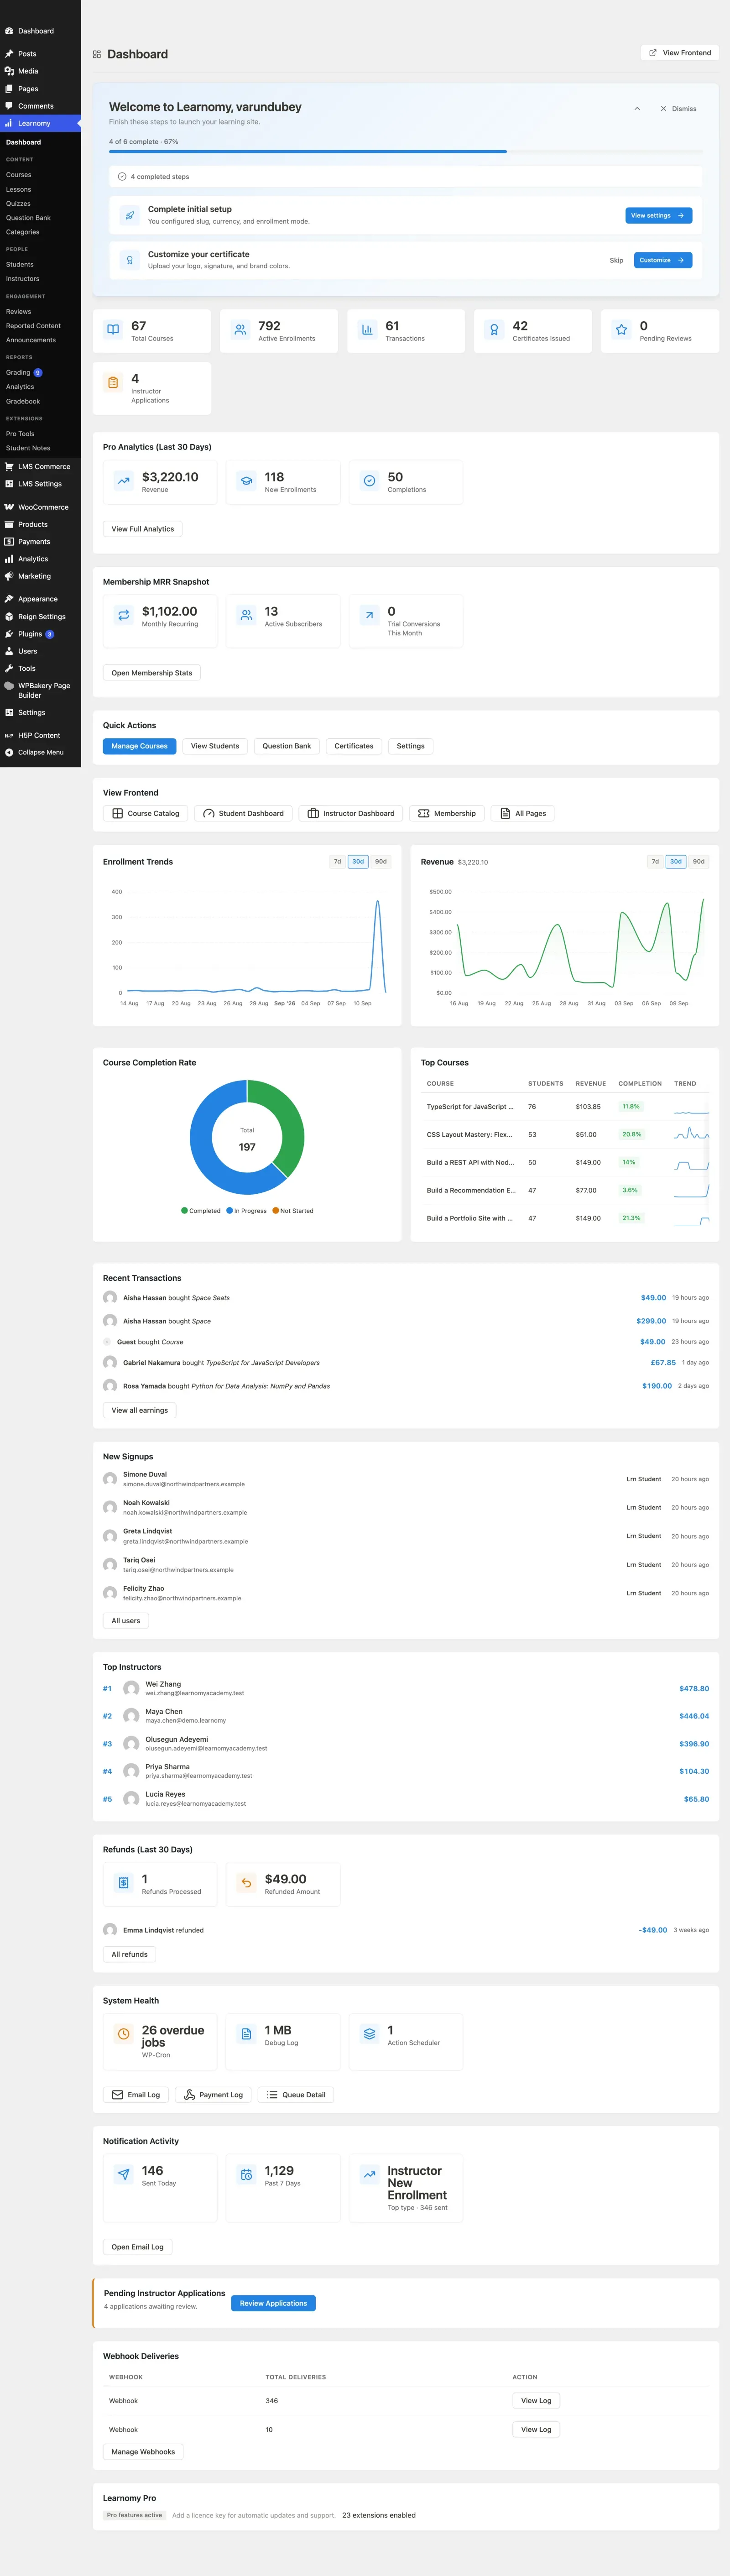
- Finish the Getting Started checklist on the admin Dashboard, which tracks most of this same ground.
The admin Dashboard shows a seven-step Getting Started checklist that covers a subset of the work below. Keep an eye on it as you go - it is the product’s own progress bar for this journey. See Onboarding checklist for what each of its steps counts as done, and why demo courses deliberately do not complete Create Your First Course.
How to use it
Section titled “How to use it”Step 1 – run the setup wizard
Section titled “Step 1 – run the setup wizard”The wizard opens on its own the first time you activate Learnomy. It takes five steps: your catalog URL and currency, an academy preset that decides which modules switch on, an optional payment connection, and an optional demo academy.
Take the demo academy if you are still evaluating - it gives every screen real numbers to look at. Skip it if this is the site you will actually launch, because you will be deleting it later.
Full walkthrough: Setup Wizard. If you skipped it, or the browser closed mid-way, reopen it from LMS Settings > Settings > General > Open setup wizard.
Step 2 – check your pages and URLs resolve
Section titled “Step 2 – check your pages and URLs resolve”Do this before you build anything. Learnomy claims a set of URL segments, and the first one - the course catalog at /courses/ - is the same path LearnDash, LifterLMS, Tutor and most other LMS plugins claim. If one of them is still active, or was active on this site in the past and left its rewrite rules behind, your catalog will 404 or land on the other plugin’s archive.
- Go to LMS Settings > Pages and read the Frontend Pages table. It lists every Learnomy page with its live URL.
- Open the catalog URL and the account URL in a new tab. Both should render Learnomy pages.
- If either is wrong, change the clashing segment in the URL Slugs card - Course URL Base for the catalog, Account URL Base for the account hub - and save. Saving refreshes your permalink rules automatically.
Every segment and its default is listed on Pages and URL Slugs.
Step 3 – turn on the modules you need
Section titled “Step 3 – turn on the modules you need”The preset you picked in the wizard enabled a starting set of modules. A disabled module is not just hidden - its admin menu, its REST routes, and its templates are not registered at all, which from the outside looks like a broken feature rather than a switch.
Go to LMS Settings > Modules and confirm the ones this journey needs are on:
- Payments, so a course can be sold and the checkout page exists.
- Certificates, so Step 7 has something to issue.
- Notifications, so Step 8 has an Email Log to read.
Turn off anything you are sure you will not use; you can come back at any time. See Enabling Features and Modules, including why some toggles are locked.
Step 4 – create your first course
Section titled “Step 4 – create your first course”Build a small real course rather than a placeholder. One section and two lessons is enough to exercise progress tracking, completion, and the certificate.
- Go to Learnomy > Courses and click Add New Course.
- Fill in the Title, Slug, Category, and Thumbnail, plus a Short Description for the catalog card. Click Save to create the draft.
- Open Completion and Certificate and set Completion Requirement to All Lessons Completed. Tick Award a certificate on completion and pick a Certificate Template. If you have no templates yet, the shortcut link in that panel opens the certificate designer at Learnomy > Certificates > Design New Template.
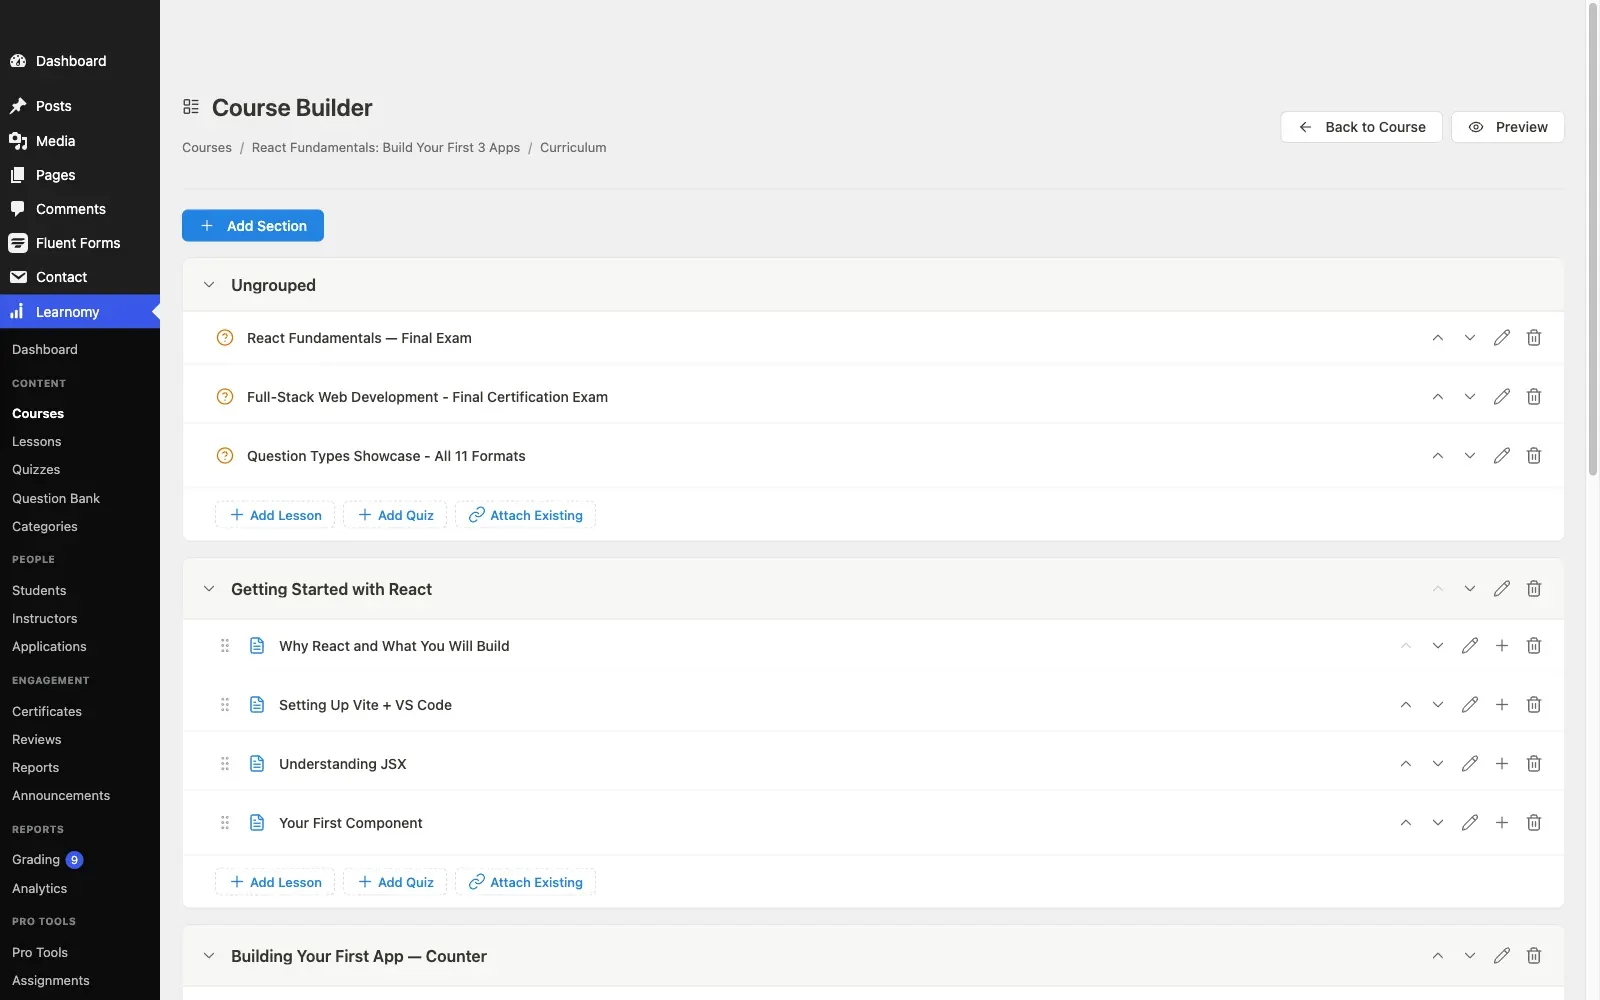
- Click Manage Curriculum to open the course builder. Click Add Section, give it a title, then click Add Lesson twice inside it and give each lesson a title and some content. The builder saves through the REST API as you go; there is no separate Save button.
- Back on the course form, set the status to Published.
Sections are optional - a flat course of two lessons works too - but building one now tells you what the student’s sidebar will look like. Details: Creating a Course and Sections and Lessons.
Step 5 – price it and connect a gateway
Section titled “Step 5 – price it and connect a gateway”Open the course form’s Pricing and Access panel and choose One-time payment (lifetime access), then set a Regular price. If no gateway is configured yet, the form shows a warning banner linking to the payments settings - that is expected at this point, and the next part fixes it.
Now pick a checkout route at LMS Settings > Payments. You have two ways to get through Step 6:
- Test Gateway. Turn it on at LMS Settings > Payments > Test Gateway. It completes any checkout instantly with no external service, and still fires every fulfilment action a real gateway does: enrollment, transaction record, coupon redemption. Test orders are recorded at 0.00 and tagged as test mode, so they never reach your revenue totals or instructor payouts. This is the fastest way to prove the buy-to-access flow before you have keys. Turn it off before you go live.
- Stripe in Test mode. Enter your
pk_test_andsk_test_keys and set Mode to Test. This exercises the real Stripe checkout without charging a card.
Either is fine for this run. Read Payment Gateways for the full comparison, including the Test Gateway section and what changes when WooCommerce is the checkout.
Pick your route before your first sale. Once a student has paid for a course, its pricing model is locked so existing customers are not disrupted.
Step 6 – buy your own course as a student
Section titled “Step 6 – buy your own course as a student”Do this in a private browsing window so you are not signed in as the administrator. Buying as yourself from an admin session skips exactly the parts that break.
- Open your catalog URL and click through to the course you just published.
- Register a new account, or sign in as a student account you created for testing.
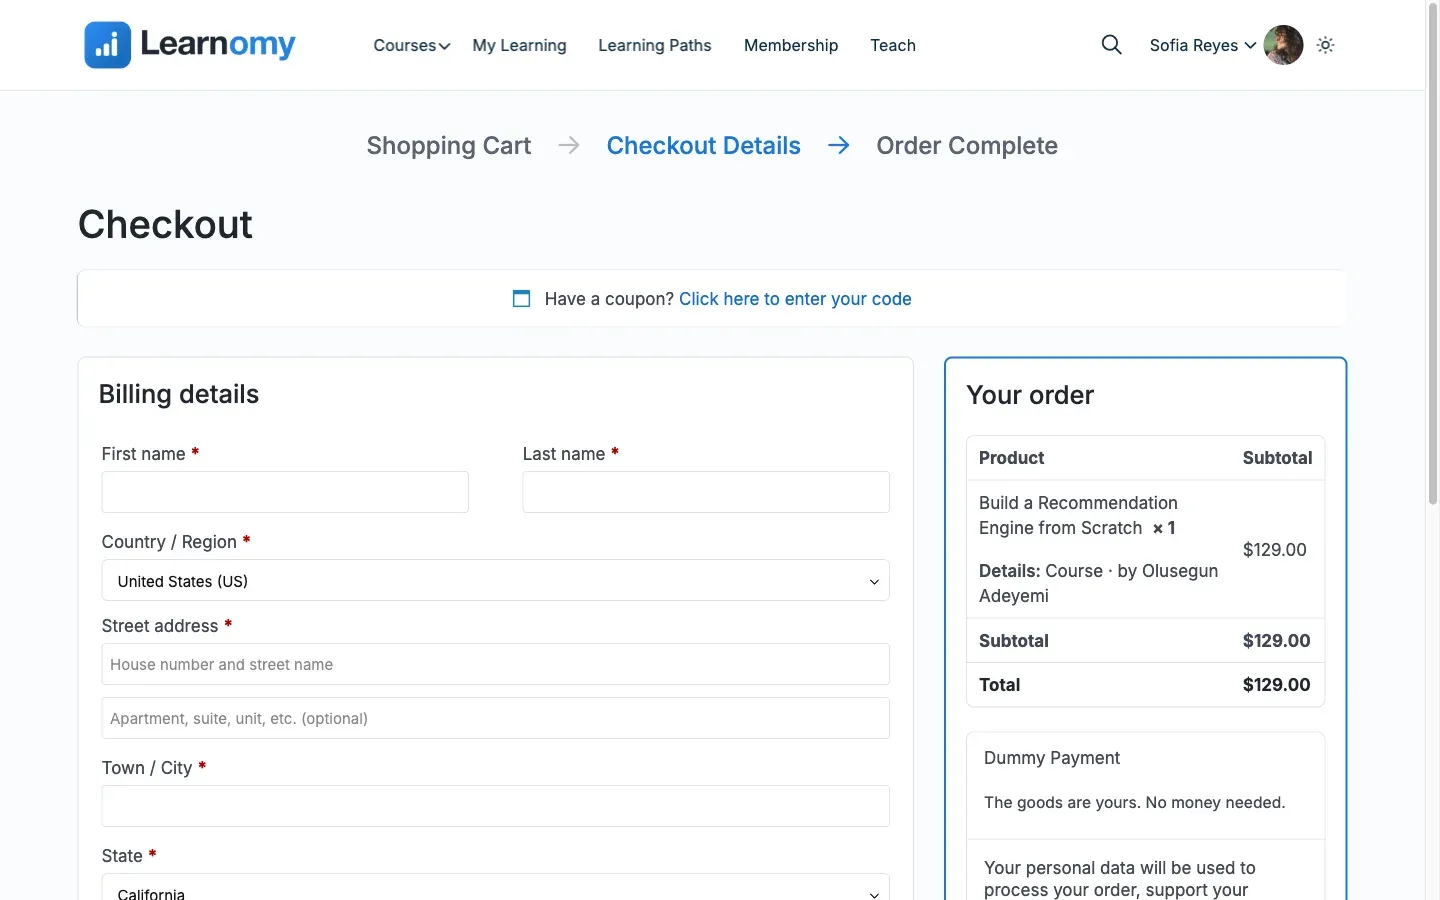
- Click the enroll or buy button. You land on the checkout page, which shows the order summary, a coupon field, and the billing form.
- Pay with the Test option (or a Stripe test card if you connected Stripe). You should land on a success result page.
- Go to
/account/courses/and confirm the course is in the student’s library and openable.
Then check the admin side of the same purchase:
- Learnomy > Students lists the new student with the enrollment against them.
- LMS Commerce > Transactions shows the order. A Test Gateway order shows provider Test and an amount of 0.00.
The full buyer-side walkthrough is Checkout and Purchase Flow.
Step 7 – confirm the certificate issues
Section titled “Step 7 – confirm the certificate issues”Still signed in as the test student, open the course and mark both lessons complete. Because you set the completion requirement to All Lessons Completed, finishing the second lesson completes the course and triggers issuance.
- The completion screen appears with your completion message.
- Go to
/account/certificates/and confirm the certificate is listed, with its download and share actions. - Open the certificate’s public verification URL and confirm it verifies.
- As administrator, check Learnomy > Certificates - the same certificate should be in the list.
If nothing was issued, the usual causes are the Certificates module being off, Award a certificate on completion not being ticked on the course, or no template selected. See Issuing and Verifying Certificates.
Step 8 – prove that email actually sends
Section titled “Step 8 – prove that email actually sends”This is the step most launches skip, and the one that causes the most support tickets afterwards.
WordPress sends through PHP’s mail() by default. Mail sent that way carries no authentication, so Gmail, Outlook and most business mail servers drop it or file it as spam. Nothing warns you: the Email Log records the message as sent, because WordPress did hand it off successfully. Your enrollment and certificate emails from the last two steps may have gone nowhere.
- Install an SMTP plugin and point it at a real mailbox or a sending service.
- Go to LMS Settings > Settings > API and Performance, find the Tools card, and click Send Test Email.
- Confirm it arrives at your admin address. Check the spam folder if it does not.
- Open LMS Settings > Email Log and look for the notifications generated by Step 6 and Step 7. Resend one to the test student’s address and confirm it lands.
Until the test email arrives, no other email setting will help. Full detail: Before you rely on email.
After the eight steps
Section titled “After the eight steps”You now have a working academy. Reasonable next moves, in rough order of how often they matter:
- Remove the demo academy if you loaded it, from LMS Settings > Settings > General > Reset demo data. This is the last step on the dashboard checklist, not the first - keep the demo while you are still exploring.
- Turn the Test Gateway off and enter live payment credentials when you are ready to take real money.
- Invite instructors if other people will author courses. See Managing Instructors.
- Import existing content if you are moving from another LMS. See Migrating from Another LMS.
- Review roles so you know what a Student and an Instructor can each reach. See Roles and Capabilities.
- Run Steps 6 and 7 in a private window every time you change pricing, gateways, or completion rules. The student view is the only one that tells you the truth.
- Keep one permanent test student account. It costs nothing and saves you registering a new one for each check.
- If a screen or menu you expect is missing, check LMS Settings > Modules before anything else. That single cause accounts for most “it is broken” reports.
- Test orders stay visible in LMS Commerce > Transactions with provider Test, so you can clean them up later without guessing which were real.
- Nothing here is one-way. Every wizard setting, slug, module, and price can be changed afterwards.