

Moderator Journey
You’re not the site owner. You don’t need access to settings, payment gateways, or plugin code. You DO need to approve / reject / triage everything the operator delegates to you: pending listings, flagged reviews, pending claims, user reports. The Pro Moderators feature gives you exactly those tools and nothing more.
Who this is for
Section titled “Who this is for”- Community manager for a large directory
- Junior team member doing first-line review approval
- Vetted vendor trusted to approve their own category’s listings
- Outsourced agency handling moderation for multiple client directories
Stage 1 - You get invited (~5 minutes, one-time)
Section titled “Stage 1 - You get invited (~5 minutes, one-time)”What happens:
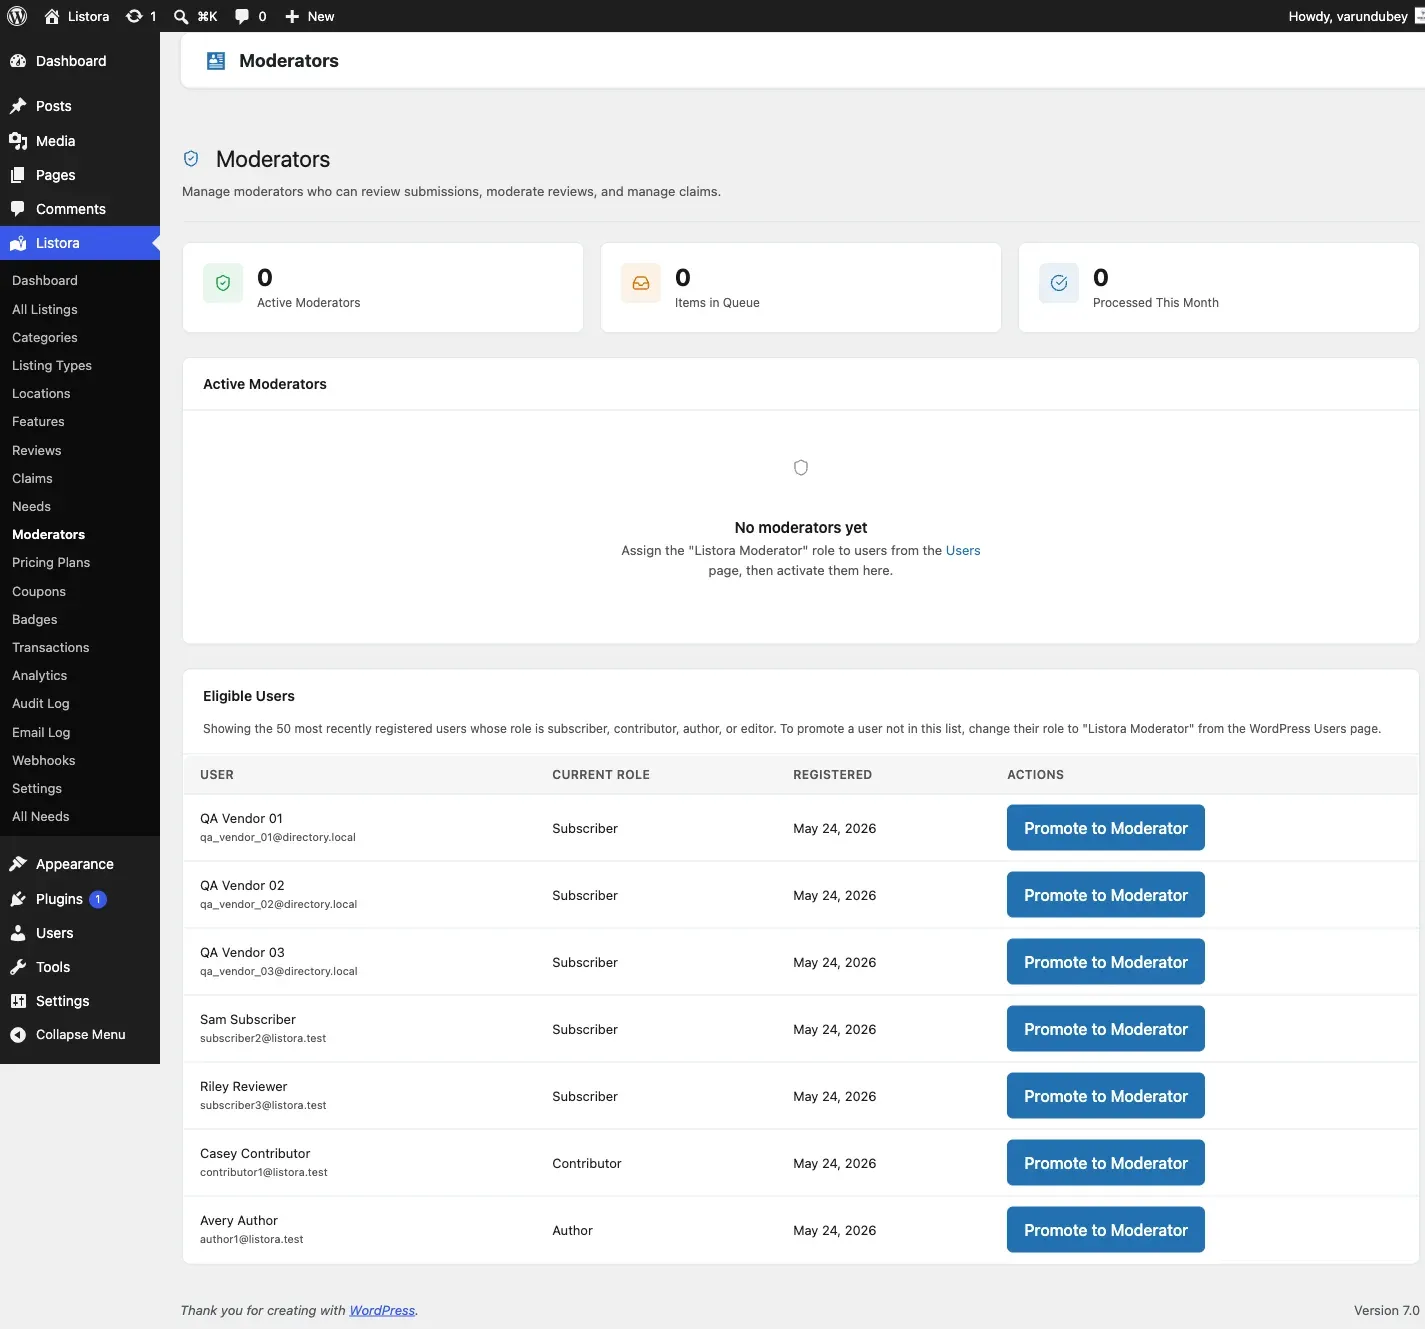
- Site Owner goes to Listora → Moderators in the admin (admin-only - that page requires
manage_listora_moderatorswhich only admins hold). - Adds your WordPress user account to the moderators list with selected scopes (Listings / Reviews / Claims / Reports).
- You receive an email notification when assigned.
- Log in - your sidebar surfaces only the moderation-relevant Listora screens (All Listings, Reviews, Claims, Reports). You do NOT see Settings, Pricing Plans, Coupons, Webhooks, Audit Log, Email Log, or the Moderators page itself.
Stage 2 - Daily triage (~15-30 minutes/day)
Section titled “Stage 2 - Daily triage (~15-30 minutes/day)”What you expect: clear separate queues for each pending item type, with enough info to decide approve/reject in seconds.
What you do - each pending type lives on its own admin page (there’s no single unified inbox; the separation is intentional so capability gating stays clean):
- Pending listings -
Listora → All Listings → filter by Pending. Row actions: Approve / Reject / Edit / Trash. Bulk-moderate (up to 100 IDs) viaPOST /listora/v1/listings/bulk-moderate. - Pending reviews -
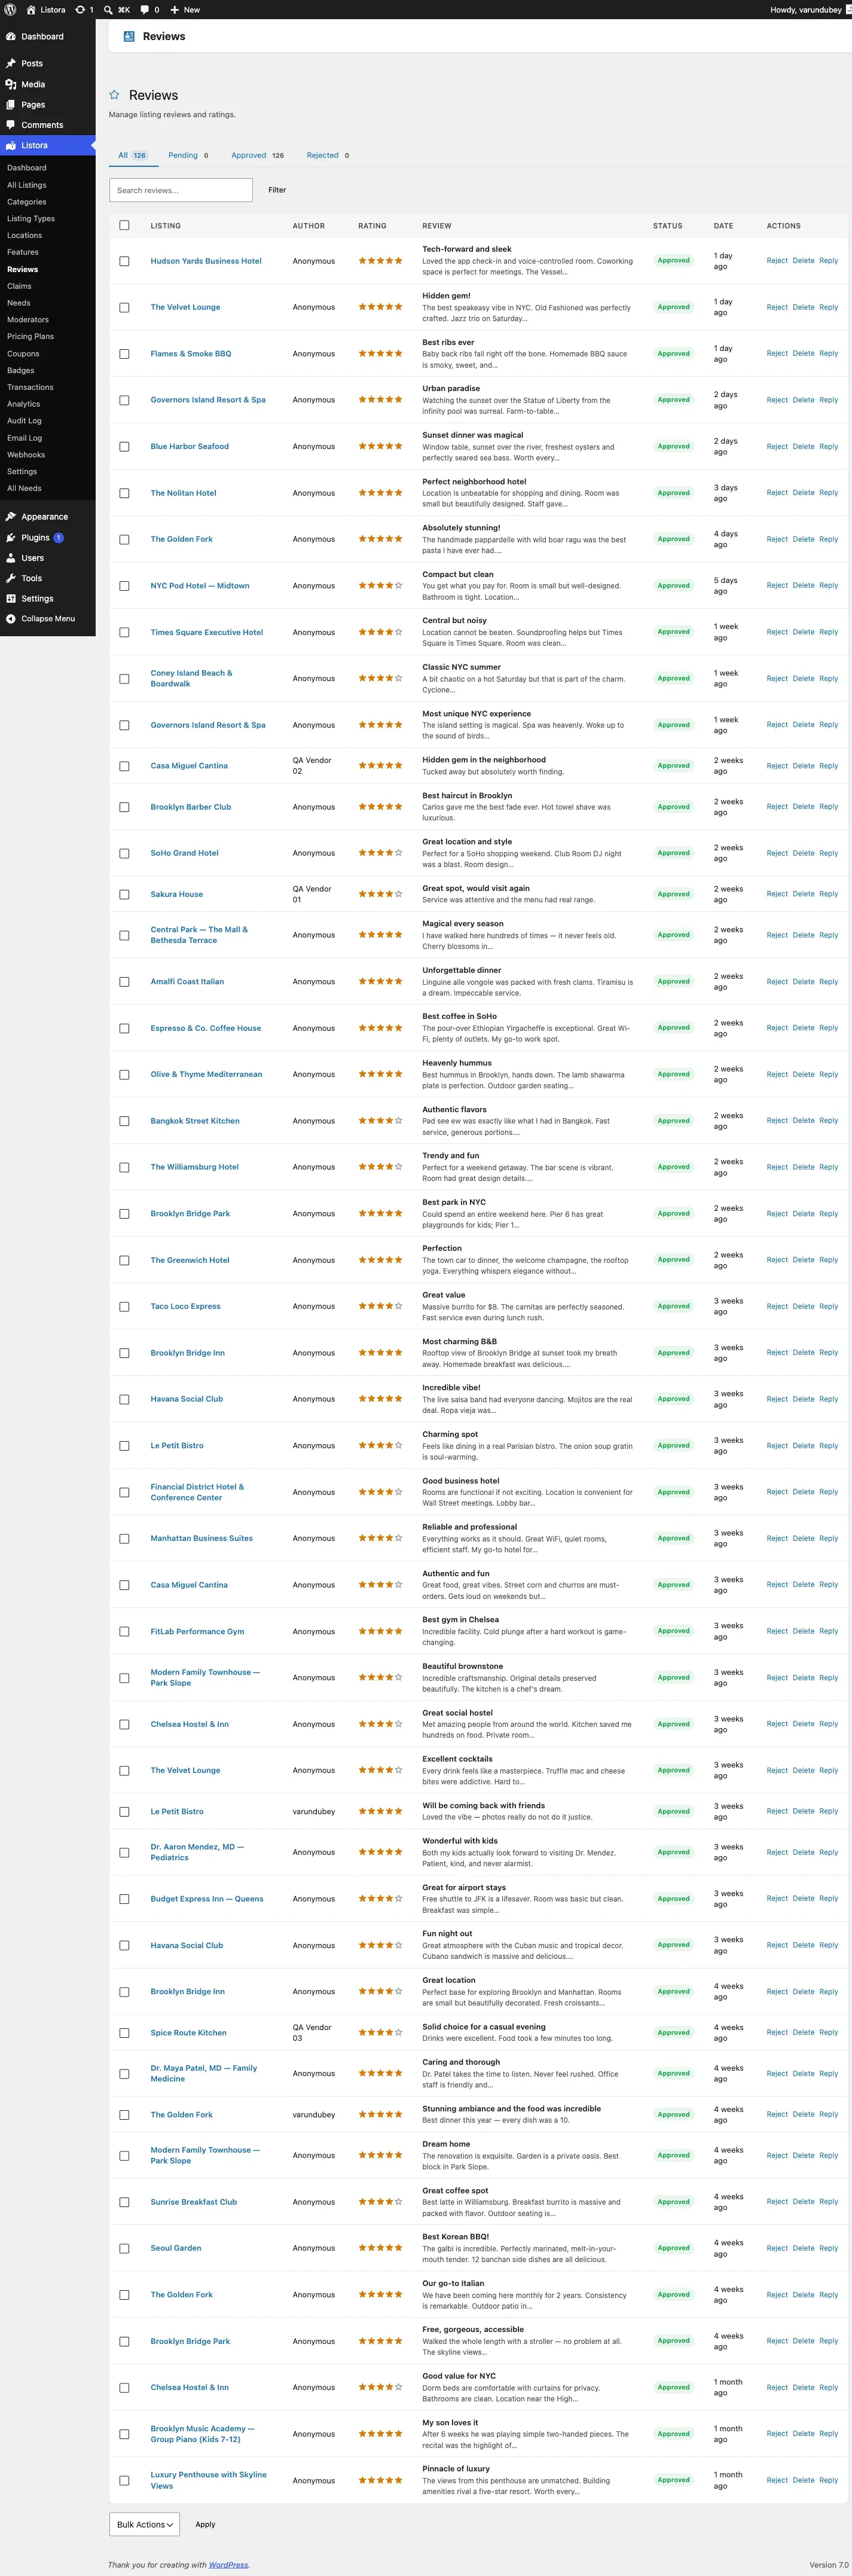
Listora → Reviews. Filter by pending status; per-row approve / reject / edit / hide. - Pending claims -
Listora → Claims. Each row shows claimant + proof file + approve / reject. - Reports -
Listora → Reports. Filed by visitors via the Report link on listings. - Status notifications fire automatically - submitters get the appropriate email per Settings → Notifications event toggles.
Stage 3 - Per-listing review (~30 seconds per item)
Section titled “Stage 3 - Per-listing review (~30 seconds per item)”What you expect: see the listing exactly as a visitor would, plus admin context (IP, submitter history, anti-spam flags).
What you experience:
- Click into a pending listing.
- Top of the page: admin-only bar showing submitter, IP, anti-spam flags, prior approval count.
- Below: the listing rendered as visitors will see it.
- Approve → transitions to
publish, owner getslisting_approvedemail. - Reject → transitions to
listora_rejected, owner getslisting_rejectedemail with the note you wrote.
Stage 4 - Claim approval (~1 minute per item)
Section titled “Stage 4 - Claim approval (~1 minute per item)”What you expect: verify the proof, transfer ownership, move on.
What you do:
- Open the pending claim.
- Download / preview the proof document the claimant uploaded.
- If legitimate → Approve →
post_authortransfers to the claimant + they getclaim_approvedemail. - If suspicious → Reject + add a note (e.g. “Proof document was for a different business - please re-upload”).
Stage 5 - Review moderation (~10 seconds per item)
Section titled “Stage 5 - Review moderation (~10 seconds per item)”What you expect: scan the review, decide if it’s spam / personal attack / valid criticism.
What you do:
- Look at the review row in the Reviews queue.
- Quick decision based on rating + content + reviewer history:
- Approve → goes live; reviewer + listing owner get notification emails.
- Reject → goes to
rejectedstatus; reviewer is silently notified (no public airing of the issue). - Edit → fix typos or trim profanity without rejecting (rare).
- Mark as spam → routed to Akismet learning.
Stage 6 - Handle reports (~1 minute per item)
Section titled “Stage 6 - Handle reports (~1 minute per item)”What you expect: see WHY something was reported, decide.
What you do:
- Reports queue shows: reporter, reported item, reason (spam / inappropriate / wrong category / duplicate / other), optional note.
- For each report:
- Resolve as no-action → mark addressed, no change to the reported item.
- Hide the item → remove from public view pending Site Owner review.
- Delete → permanently remove (requires extended caps).
What you can and cannot do
Section titled “What you can and cannot do”| You CAN | You CANNOT |
|---|---|
| Approve / reject pending listings | Edit Settings |
| Approve / reject pending reviews | Manage Pricing Plans |
| Approve / reject business claims | Manage Coupons |
| Resolve reports | View Webhooks |
| Hide flagged content | View Audit Log |
| Add admin notes | Manage Moderators (only Site Owner can) |
| See pending-item counts in dashboard | See revenue / Transactions |
| Use bulk-moderate operations | Modify the moderator list |
This separation is enforced by capability gating - the moderator caps grant exactly these surfaces and nothing else.
What you do NOT have to do
Section titled “What you do NOT have to do”- No Worry about email delivery - auto-notifications fire on every transition.
- No Manually track who reported what - Reports queue is the audit trail.
- No Edit settings to enable a feature - Site Owner controls toggles.
- No Manage the moderator list yourself - only Site Owner can add/remove moderators.
Common pitfalls
Section titled “Common pitfalls”| Pitfall | Avoid by |
|---|---|
| Approving a low-quality listing because you didn’t read the description | Always click into the listing detail before approving |
| Rejecting a valid claim because proof format is unfamiliar | Ask the Site Owner; err on side of “more info” via admin note |
| Bulk-approving without spot-checking | Sample 1-in-10 manually before bulk-action |
| Reviewing the same item twice | Approved/rejected items disappear from queue - use filter chips to re-find |
Related
Section titled “Related”- Site Owner Journey - what the operator does (different scope).
- Listing Owner Journey - what submitters experience (different role).
- Moderators feature - full moderators feature doc.
- Moderation Queue feature - the unified queue.
- Capabilities & Roles - the cap map that gates everything above.
- Audit Log - every moderation action is recorded.