

Processing Withdrawals
When vendors request payouts, their requests land in your withdrawal queue. Here is how to review, approve, and complete them.
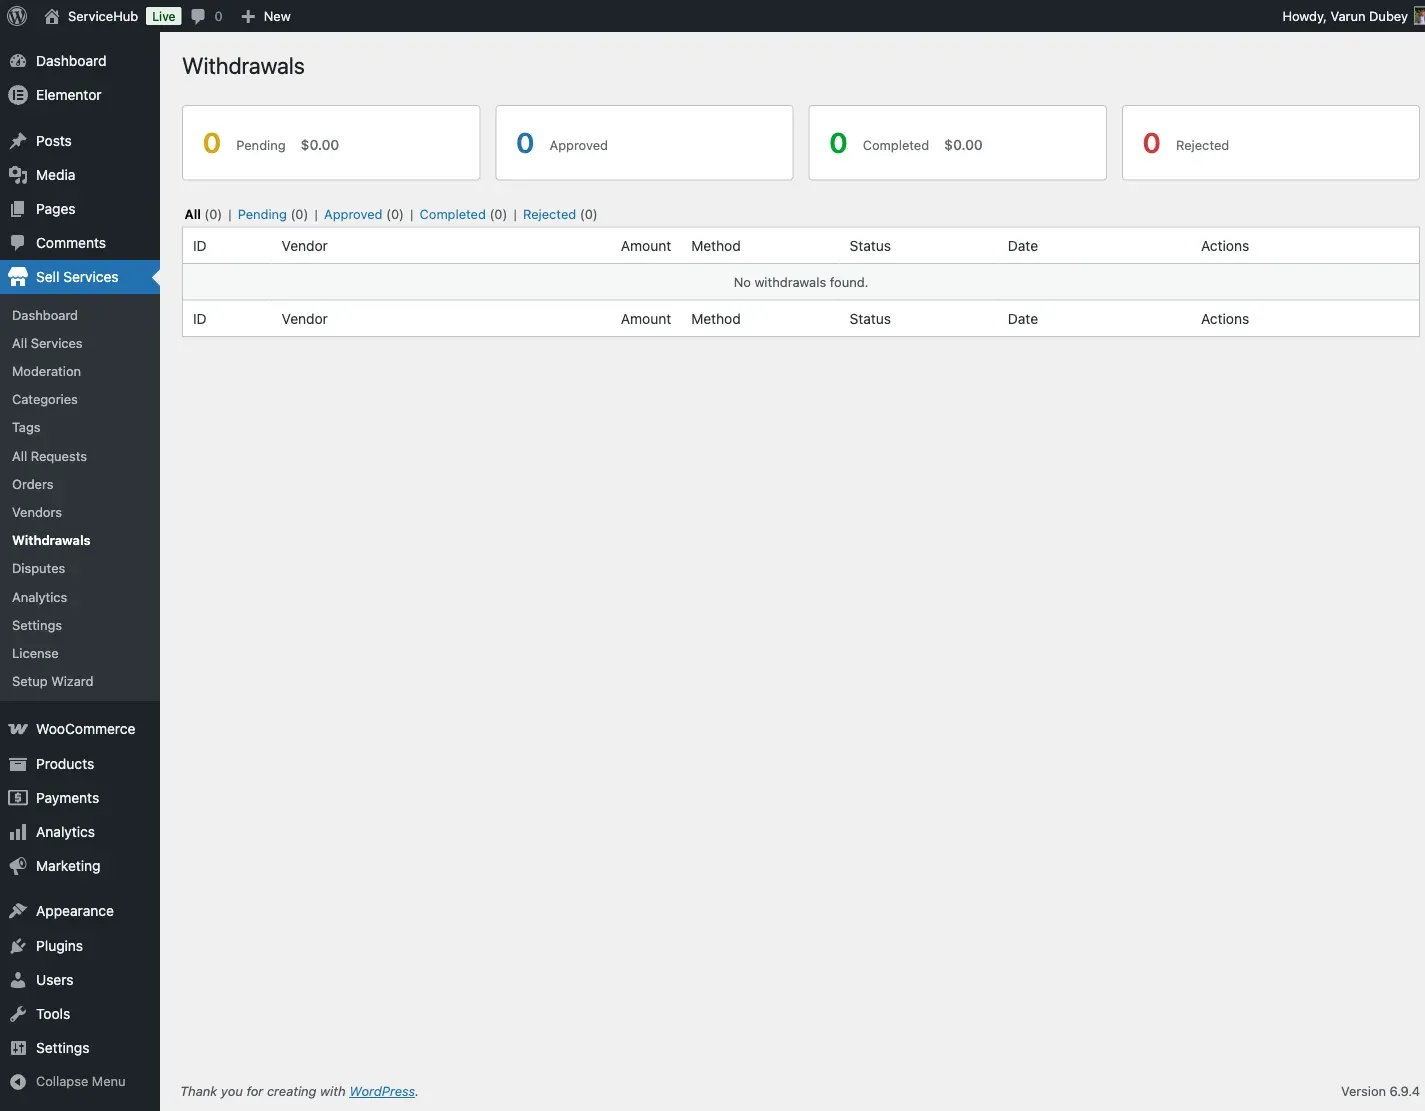
Where to Find Withdrawal Requests
Section titled “Where to Find Withdrawal Requests”Go to Sell Services > Withdrawals in your WordPress admin. You will see summary cards at the top and a list of all withdrawal requests below.
Summary Cards
Section titled “Summary Cards”| Card | What It Shows |
|---|---|
| Pending | Requests waiting for your review, with total amount |
| Approved | Requests you have approved but not yet marked complete |
| Completed | Successfully paid out, with total amount |
| Rejected | Requests you denied |
The Withdrawal Queue
Section titled “The Withdrawal Queue”Each request in the list shows:
- Vendor name and email – who is requesting the payout
- Amount – how much they want to withdraw
- Method – bank transfer or PayPal, plus their account details
- Status – pending, approved, completed, or rejected
- Date – when the request was submitted (and processed date, if applicable)
- Action buttons – approve, reject, or mark complete depending on current status
Filtering
Section titled “Filtering”Click the status tabs above the table to view only pending, approved, completed, or rejected requests. This makes it easy to focus on what needs your attention.
The Approval Workflow
Section titled “The Approval Workflow”Step 1: Review the Request
Section titled “Step 1: Review the Request”Click Approve on a pending withdrawal. A confirmation popup shows the vendor name, amount, and payment method. You can add an optional admin note.
Before approving, verify:
- The vendor has sufficient available balance
- Payment details look complete and correct
- There are no unresolved disputes on recent orders
Step 2: Approve
Section titled “Step 2: Approve”Click Confirm in the popup. The request status changes to Approved and the vendor receives a notification.
Step 3: Send Payment
Section titled “Step 3: Send Payment”Process the payment outside of WordPress – send the bank transfer or PayPal payment using the vendor’s account details shown in the request.
Step 4: Mark as Completed
Section titled “Step 4: Mark as Completed”After you have sent the payment, return to the withdrawal request and click Mark Completed. Add a note with the transaction reference (e.g., PayPal transaction ID or bank transfer reference). The vendor receives a completion notification.
Rejecting a Withdrawal
Section titled “Rejecting a Withdrawal”Click Reject on any pending or approved request. Enter a reason explaining why (e.g., “Payment details are incomplete – please update your bank account number and resubmit”).
When rejected:
- The funds return to the vendor’s available balance (nothing is lost)
- The vendor receives a notification with your reason
- The vendor can fix the issue and submit a new request
Bulk Processing
Section titled “Bulk Processing”For marketplaces with many vendors, the typical weekly workflow looks like this:
- Filter by Pending to see all new requests
- Review and Approve each valid request
- Process all approved payments in one batch (via PayPal or bank)
- Return and Mark Completed for each one, noting the transaction reference
Auto-Withdrawal Requests
Section titled “Auto-Withdrawal Requests”If you have automated payouts enabled, system-generated withdrawal requests appear in the same queue with an “Auto” badge. Process them the same way as manual requests.
Admin Notes
Section titled “Admin Notes”Use the admin notes field to keep a record of:
- Payment transaction IDs or reference numbers
- Special circumstances or exceptions
- Rejection reasons (visible to the vendor)
- Internal notes for your team
Best Practices
Section titled “Best Practices”- Process withdrawals promptly – aim for 1-3 business days after submission
- Always add transaction references when marking complete – this protects both you and the vendor
- Check for disputes before approving – if a vendor has active disputes, consider waiting until they are resolved
- Keep rejection reasons clear – tell the vendor exactly what to fix so they can resubmit successfully
- Review withdrawal history for patterns – unusually frequent or large requests may warrant a closer look
Withdrawal Limits
Section titled “Withdrawal Limits”Minimum withdrawal amount: Default is $25 (configurable in Settings > Payouts)
Clearance period: Earnings must pass the clearance period before they become available for withdrawal. It ships at 0 days (earnings clear immediately); raise it in Settings > Payouts if you want a refund buffer
Vendors cannot request more than their available balance, and they cannot have multiple pending requests at the same time.
Related Docs
Section titled “Related Docs”- Vendor Management – Managing vendor accounts
- Commission System – How earnings are calculated
- Withdrawals – The vendor-side withdrawal experience
- Automated Payouts – Scheduled auto-withdrawals