

Managing Students (Admin)
Managing Students (Admin)
Section titled “Managing Students (Admin)”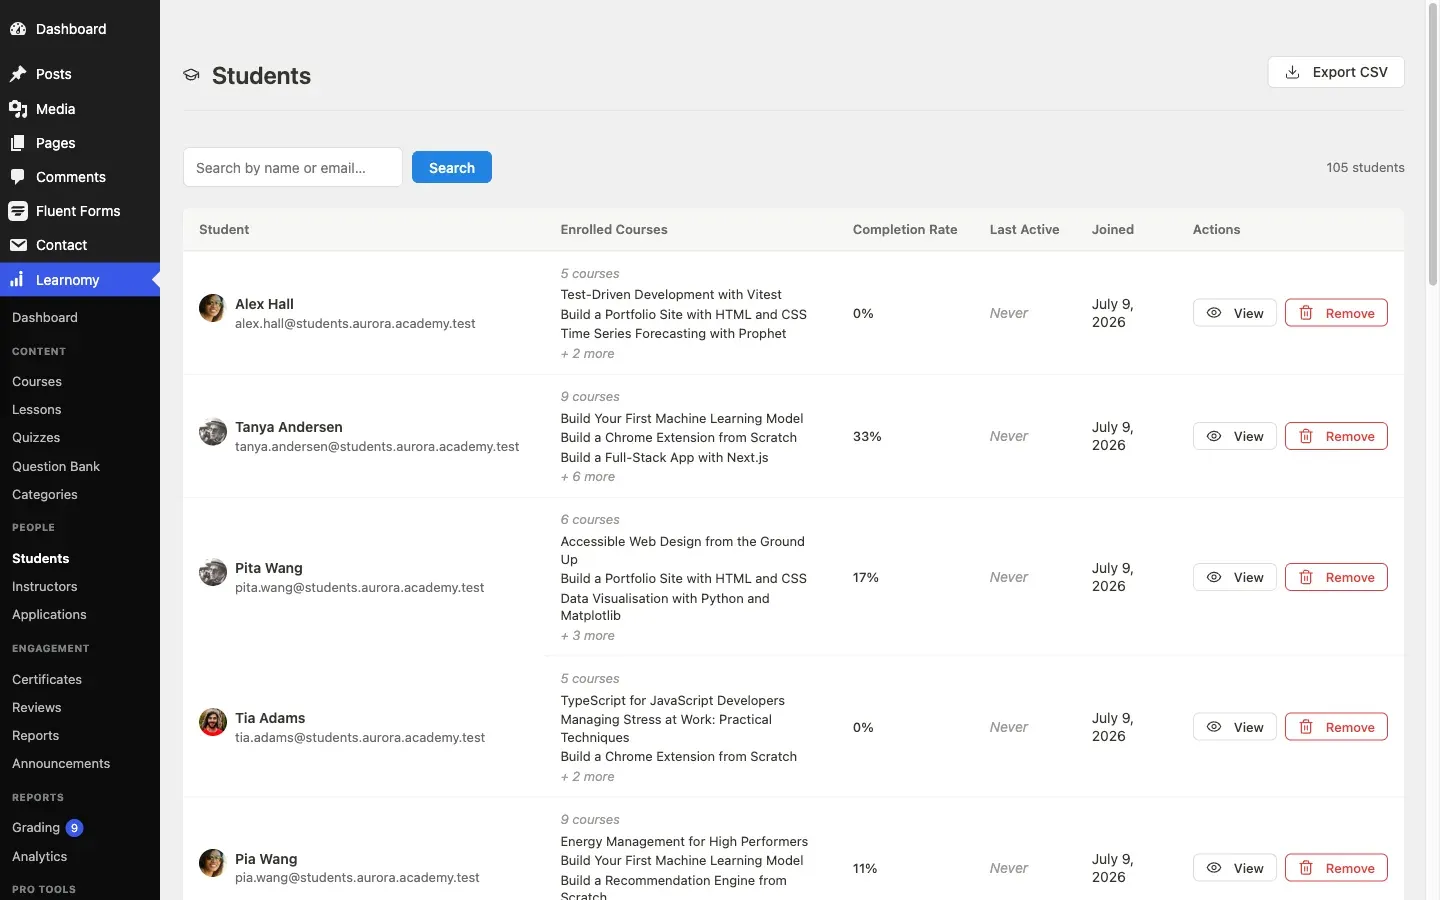
The Students section of the WordPress admin gives you a bird’s-eye view of every learner on your site and a per-student detail page where you can see their full history and take management actions.
What you can do
Section titled “What you can do”- See everyone who has enrolled in at least one course, with their completion rate and when they were last active.
- Find the students who have gone quiet, and email them.
- Open one student and see everything about them in one place: enrollments, progress, quiz attempts, certificates, payments.
- Enroll a student in a course by hand, or remove them.
- Remove a student from the site entirely, and decide what happens to their data.
How to use it
Section titled “How to use it”Step 1 - find the student
Section titled “Step 1 - find the student”Go to Learnomy > Students and search by name or email. The list only contains people enrolled in at least one course, so someone who registered and never enrolled will not appear here - look in the WordPress Users screen instead.
Step 2 - open their detail page
Section titled “Step 2 - open their detail page”Click the name. Everything Learnomy knows about that learner is on one page, which is what you want when answering “I paid and I cannot get in”.
Work down it in this order when investigating: does the enrollment exist, has the payment been recorded, and does the progress match what they are telling you.
Step 3 - act
Section titled “Step 3 - act”Enroll them in a course by hand if a purchase did not land. Reset progress if they ask to start again. Both are on the detail page.
Step 4 - chase the quiet ones
Section titled “Step 4 - chase the quiet ones”Use the inactivity filter on the list to find students who have not been back in 7, 14 or 30 days, and contact them from there. This is the one screen that turns a list of names into retention work.
The Students list
Section titled “The Students list”Go to Learnomy > Students.
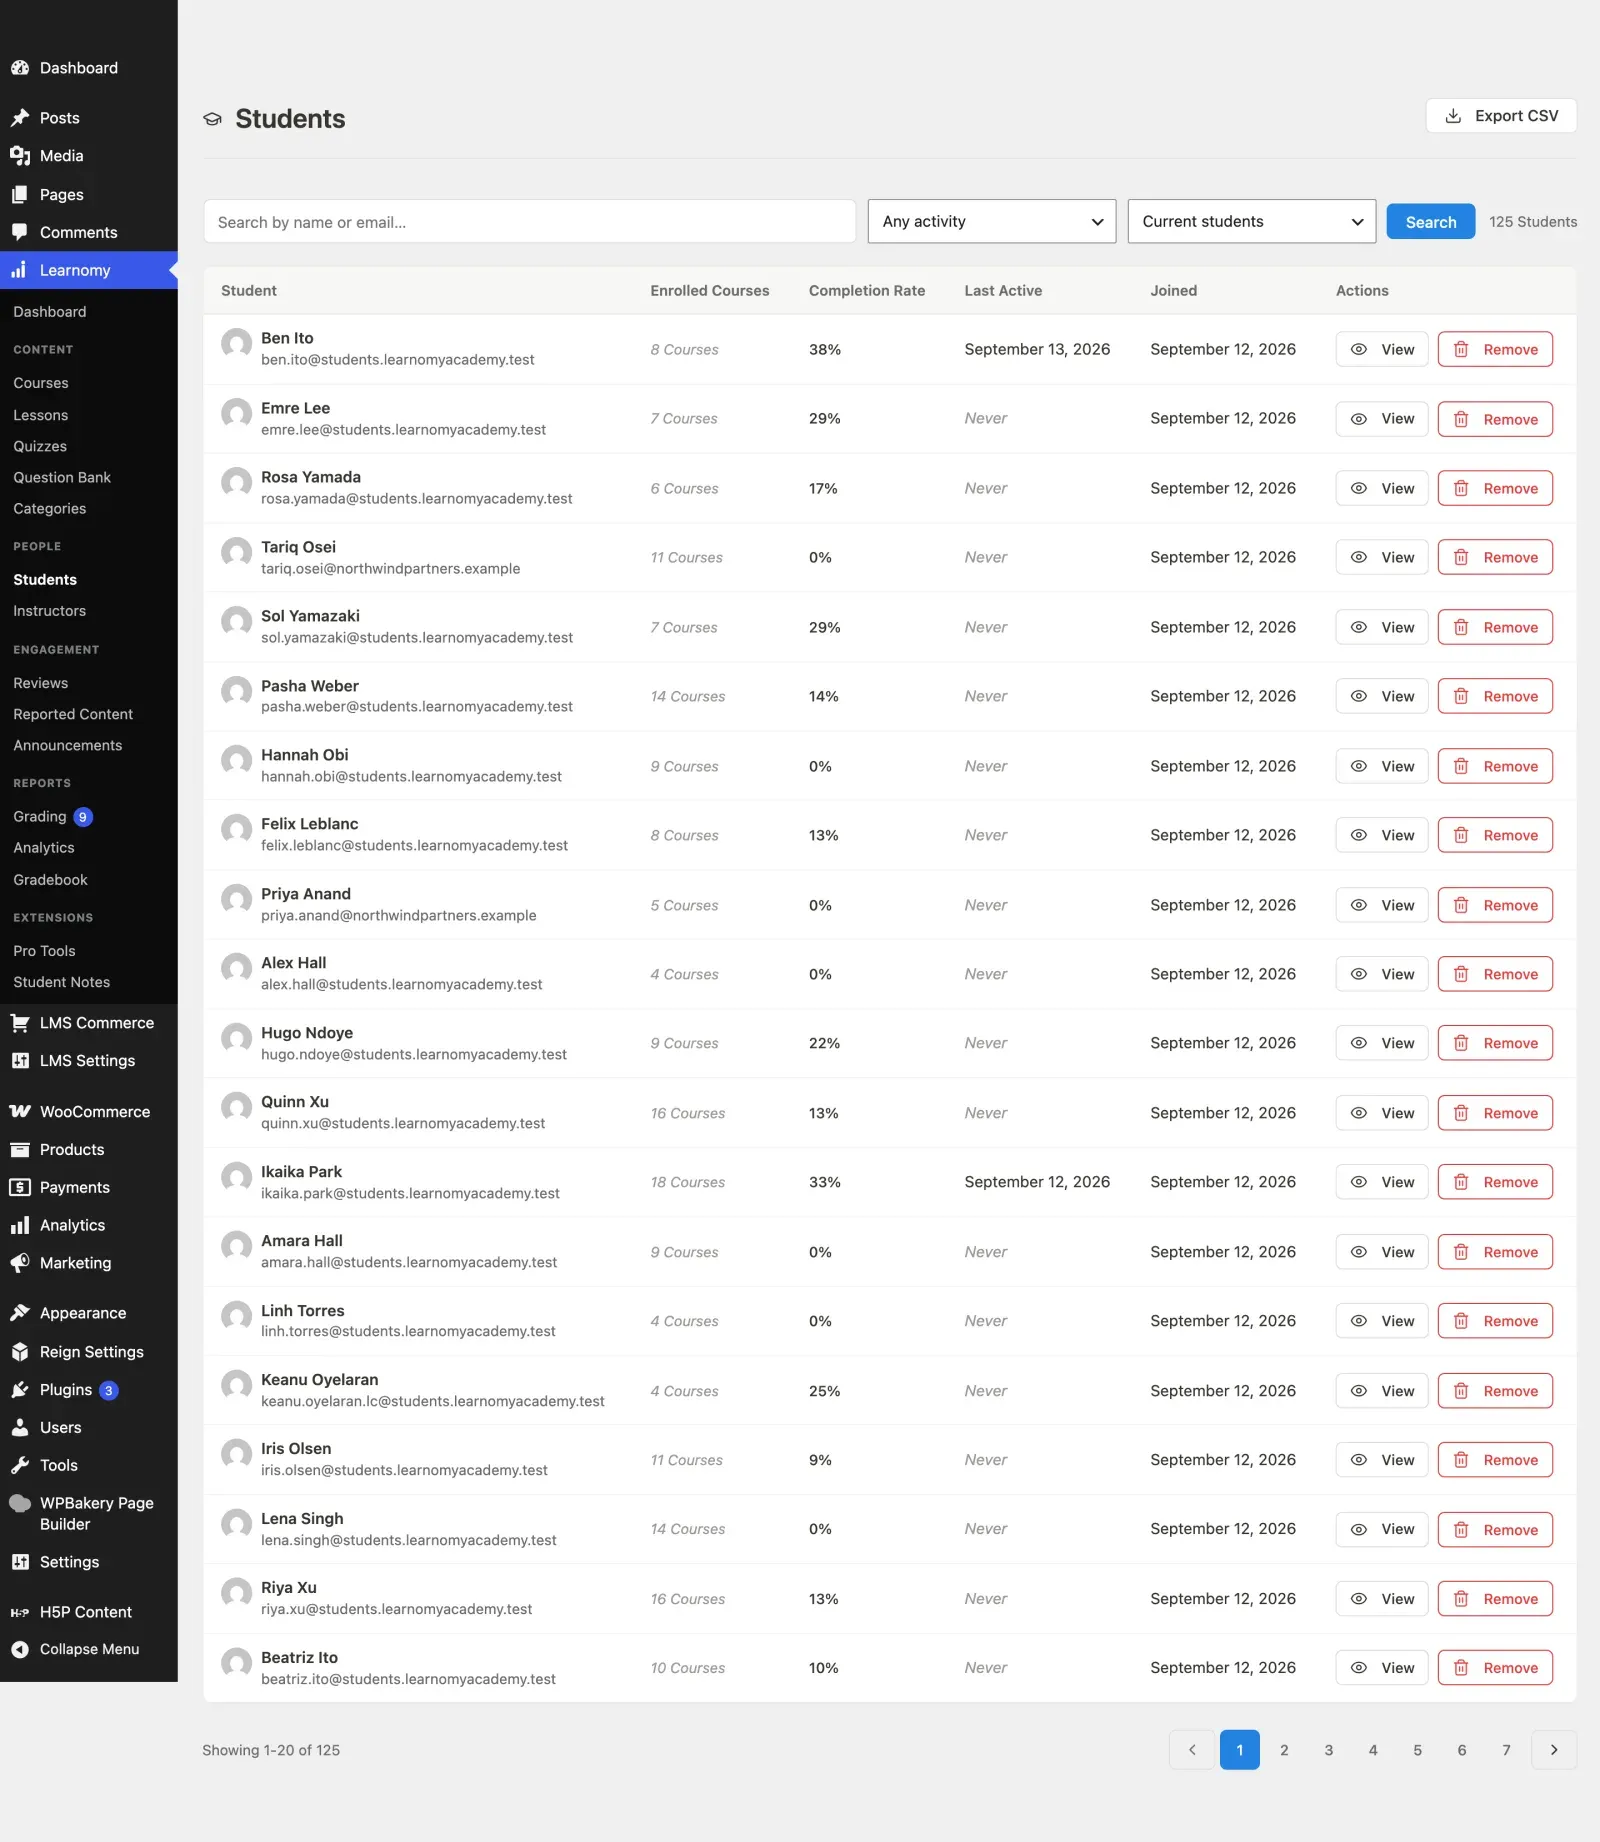
The list shows every user who has enrolled in at least one course. Each row shows the student’s name and email, how many courses they are enrolled in, their completion rate (as a percentage), their last active date, and the date they joined. (Lifetime spend is not a column here - it appears on the per-student detail page’s Learning summary card.)
Use the search field at the top to find a student by name or email. Next to it, the inactivity dropdown filters the list by how long a student has been inactive - “Any activity”, “Inactive 7+ days”, “Inactive 14+ days”, or “Inactive 30+ days”.

Reaching an inactive student
Section titled “Reaching an inactive student”Finding the lapsed students is only half the job. There are two ways to get an email to them, and they use the same message.
The automatic nudge
Section titled “The automatic nudge”Learnomy checks once a day for students whose active, uncompleted courses have gone quiet past your inactivity threshold, and emails them the Re-engagement Reminder - a short note pointing back at their dashboard. A student is nudged once per lapse, not once a day.
The threshold is Inactive after (N) days on LMS Settings > Emails, and it defaults to 14 days, matching the “Inactive 14+ days” option in the filter above. Turning off the Re-engagement Reminder toggle in the same settings screen stops the email, but not the daily sweep: the in-app notification is still written and the learner is still marked as nudged. So a lapse that passes while the toggle is off does not produce an email later either - that learner waits a full threshold window before becoming eligible again. Full configuration is in Emails and Announcements.
Sending one yourself
Section titled “Sending one yourself”Instructors get the same message as a one-click action. The Students at Risk card on the instructor dashboard - it appears on the Overview and in the Students section - lists up to five of their own students who have not made progress in 14 days or who never started at all, each row showing how long they have been quiet.
Click Send reminder on a row to email that one student straight away. The button confirms with “Reminder sent” and does not need the daily sweep to come round.
Two things this respects, so nobody gets mail they have refused:
- If you have switched the Re-engagement Reminder off in settings, the button sends nothing.
- If that student has opted out of promotional email on their own account page, they are skipped.
An instructor only ever sees, and can only ever nudge, students enrolled in courses they author. View all inactive students at the bottom of the card opens the full list.
The card’s own 14-day threshold is fixed and separate from the Inactive after setting, so it keeps naming the same people whichever threshold you choose for the automatic sweep.
The student detail page
Section titled “The student detail page”Click a student’s name, or click View in the row actions, to open the student detail page.
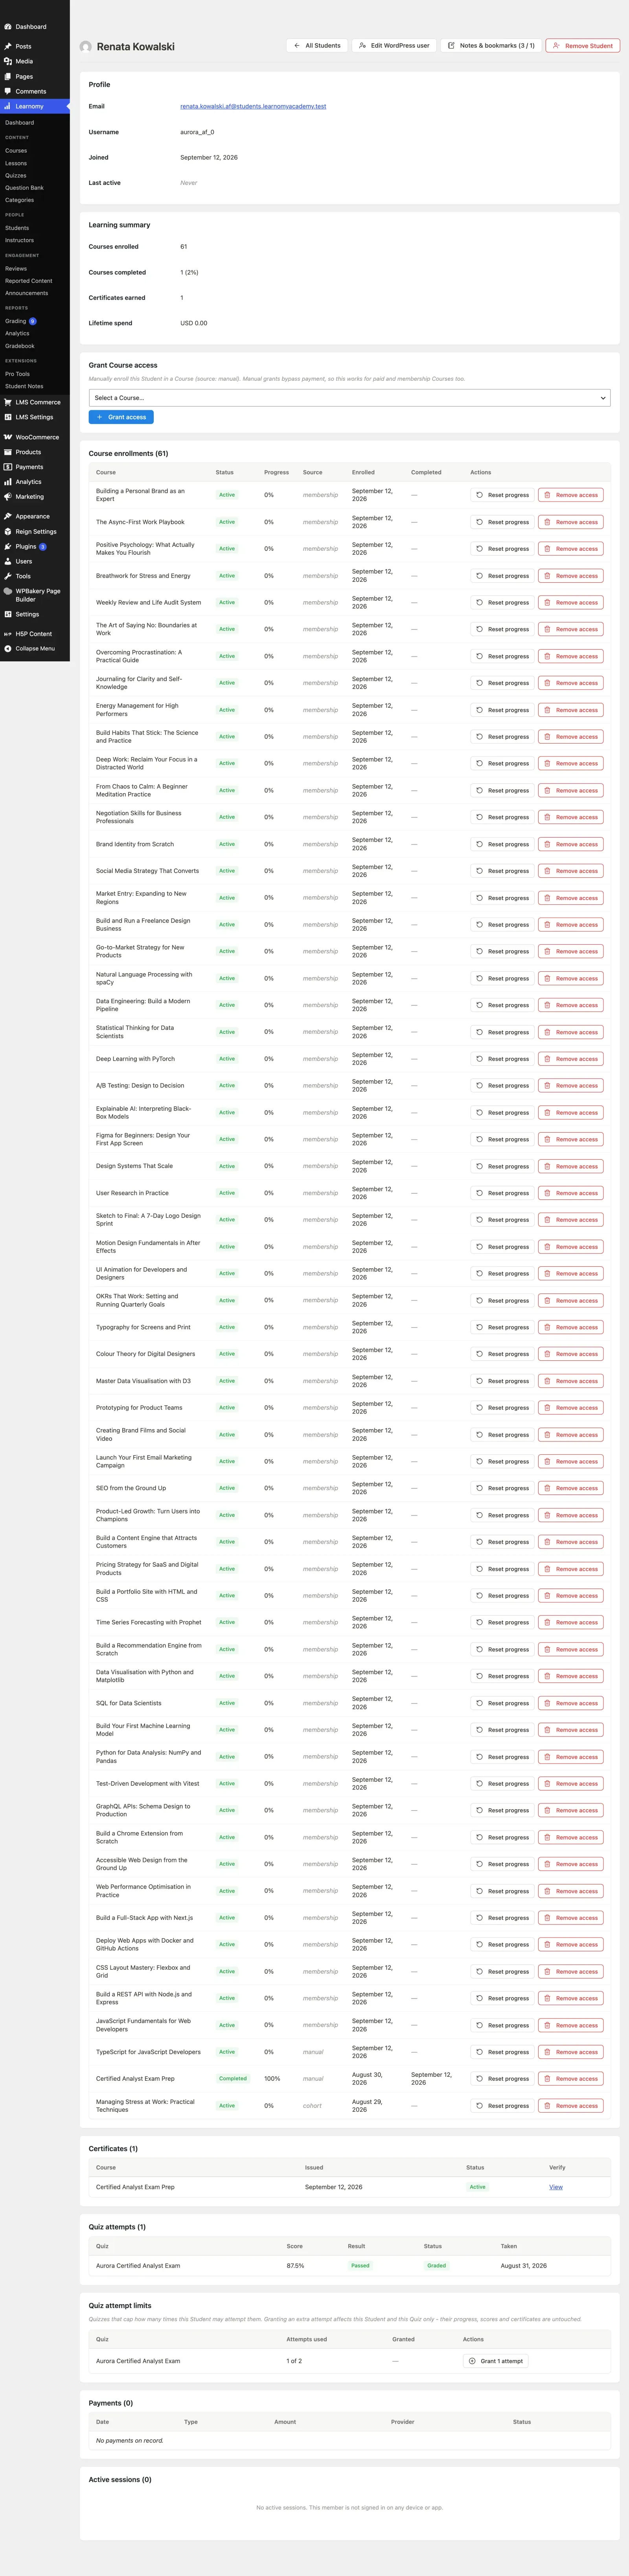
The detail page collects all of that student’s Learnomy data in one place. Administrators see every card and every management action. Instructors who reach the page via their own course data see the same cards but without the management controls.
Profile card
Section titled “Profile card”Shows the student’s email, WordPress username, registration date, and the date they were last active on the site.
Learning summary card
Section titled “Learning summary card”A four-row summary at a glance:
| Field | What it shows |
|---|---|
| Courses enrolled | Total number of courses the student is enrolled in. |
| Courses completed | Completed count and completion rate as a percentage of enrollments. |
| Certificates earned | Number of certificates issued to this student. |
| Lifetime spend | Total amount the student has paid across all transactions. |
Grant course access (admin only)
Section titled “Grant course access (admin only)”A dropdown lets you manually enroll the student in any published course they are not already enrolled in. Manual grants bypass payment, so this works for paid courses and membership-gated courses. The enrollment is recorded with source manual.
If the student is already enrolled in every published course, the card shows a notice instead of the dropdown.
Course enrollments
Section titled “Course enrollments”A table of every course the student is enrolled in, with columns for:
- Course - links to the course editor.
- Status - enrollment status badge (active, completed, expired, etc.).
- Progress - percentage of lessons marked complete.
- Source - how the enrollment was created (purchase, manual, membership, etc.).
- Enrolled - the date the enrollment was created.
- Completed - the date the course was completed, or a dash if not yet complete.
Row actions (admin only):
- Reset progress - clears the student’s lesson completions and quiz attempts for that course. The enrollment remains active; the student starts from the beginning.
- Remove access - deletes the enrollment entirely. The student loses access to the course and their progress for it is removed.
When a student holds more than one grant
Section titled “When a student holds more than one grant”A student can reach the same course through more than one route: they might buy it and also receive it through a membership or a Space. Learnomy stores one enrollment record per route, so both grants can be managed on their own.
That means two screens answer two different questions, and they are labelled accordingly:
- The Enrollments panel on the course editor counts people. Each student appears once, with a chip for every grant they hold, for example
FreeandMembership. Paid grants (purchase, subscription, membership) are highlighted so you can tell a paying student from a comped one at a glance. - The Enrolled students table on the course overview lists records. A student with two grants appears once per grant, each row with its own Remove access action, so you can revoke the purchase and leave the membership in place. When the two numbers differ, a line above the table explains why.
Removing one grant does not remove the others. If a student still has access after you revoke a purchase, check the course overview for a second row - a membership or Space grant is usually still active.
Certificates
Section titled “Certificates”A table of every certificate Learnomy has issued to this student: the course it was issued for, the issue date, the certificate status, and a link to the public verification page. An empty state appears if no certificates have been earned yet.
Quiz attempts
Section titled “Quiz attempts”A table of all quiz attempts this student has made, showing the quiz name, score percentage, pass/fail result, attempt status (Submitted, Graded, etc.), and the date the attempt was submitted.
Quiz attempt limits - granting an extra attempt
Section titled “Quiz attempt limits - granting an extra attempt”Below the attempts table, a Quiz attempt limits card shows one row per quiz this student has attempted that has an attempt cap. Quizzes with unlimited attempts are not listed, because there is nothing to grant.
Each row shows what the cap actually is for this student - the quiz’s own limit plus anything already granted to them - against how many attempts they have used. That is the state you need before deciding to hand out another.
Two actions sit on each row:
- Grant 1 attempt - gives this student one more attempt at that quiz. It affects only this student and only this quiz; the quiz’s setting is unchanged for everyone else.
- Take back 1 attempt - reverses a grant.
Use this when a student was cut off by a genuine problem - a browser crash, a power cut, a mis-set cap - rather than lowering the cap for the whole cohort.
Who can use it, per row: an administrator sees the action on every row. An instructor sees it only on quizzes belonging to courses they can grade. Rows they cannot act on show a dash, so the table still lines up.
The granted total is stored per student, so repeated grants accumulate, and the student’s own quiz screen reflects the new figure immediately - the start gate, the results screen and the “Try Again” button all read the same effective limit.
To change the cap for everyone taking a quiz, edit Maximum attempts on the quiz itself instead. See Building a Quiz.
Payments
Section titled “Payments”A table of every payment transaction associated with this student: date, transaction type, amount, payment provider, and status. An empty state appears if no payments are on record (for example, a student who only enrolled via manual grant or a free plan).
Removing a student
Section titled “Removing a student”The Remove student button in the page header (admin only) deletes all of the student’s course enrollments. Their WordPress user account is not deleted and they can re-enroll in courses afterwards. Use this to clear a test account or when a student requests removal of their learning data.
A confirmation prompt appears before anything is deleted.
- The student detail page is almost entirely read-only for instructors. They can see a student’s enrollments, quiz attempts, and certificates for courses they co-instruct, but they cannot grant course access, reset progress, or remove the student. The one action they do get is Grant / Take back 1 attempt, and only on quizzes belonging to courses they can grade.
- The completion rate in the Learning summary card is calculated as completed courses divided by enrolled courses. A student enrolled in 5 courses who completed 2 shows 40%.
- Resetting progress does not affect the enrollment status or the enrollment record. The student keeps access to the course and can work through it again from the beginning.
- The Payments table shows all transactions linked to the student’s user ID. It includes refunds as well as purchases.