

Add Your First Video
After completing the setup wizard, you’re ready to register and embed your first protected video.
Step 1 - Create a video in the library
Section titled “Step 1 - Create a video in the library”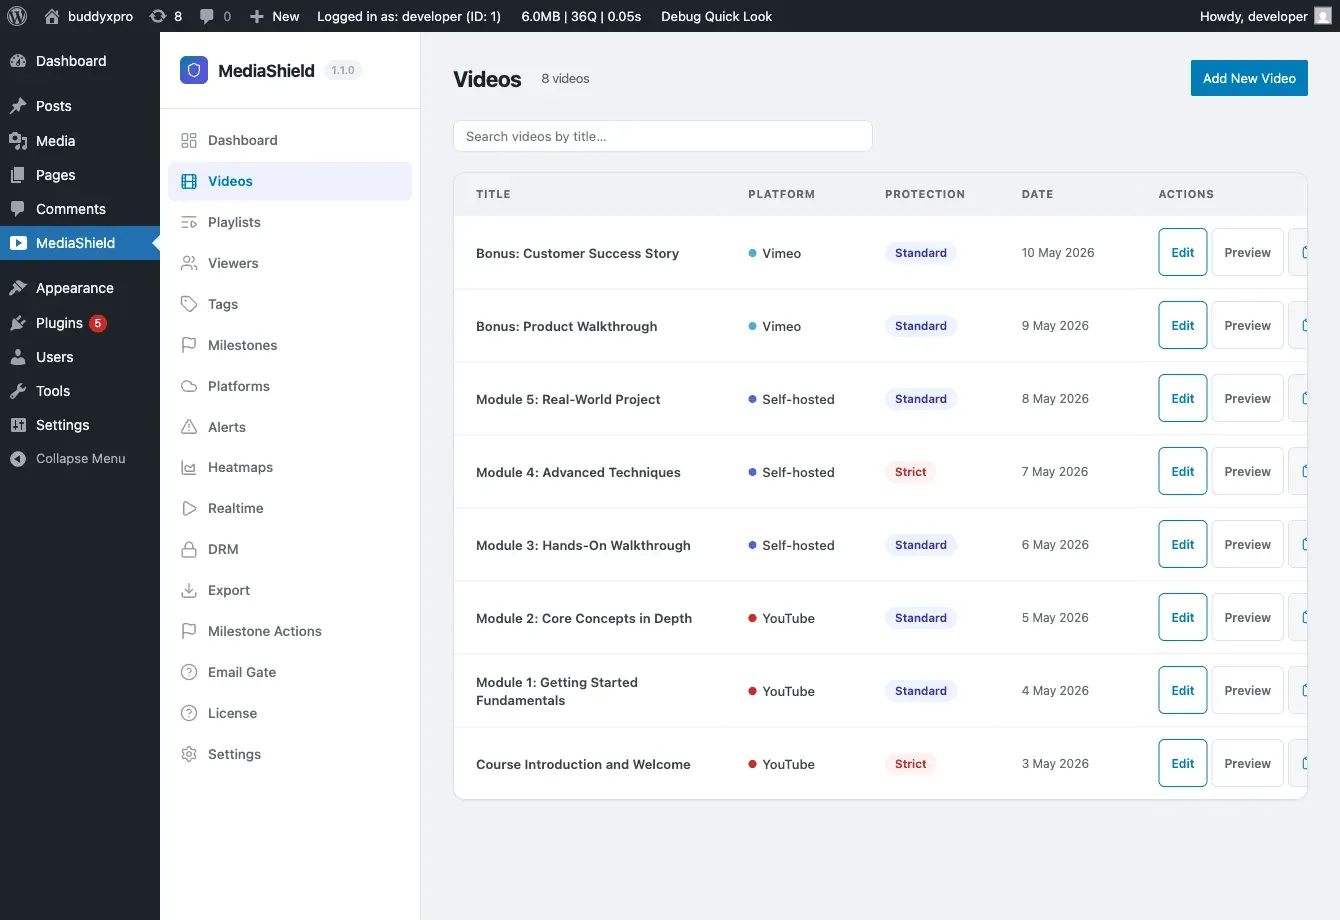
Go to MediaShield > Videos and click Add New Video.
Fill in the fields:
Platform - Choose where the video is hosted: Self-hosted, YouTube, Vimeo, Bunny, or Wistia.
Source URL or Video ID - Paste the video URL. MediaShield extracts the platform’s video identifier from the URL and stores it alongside the original URL.
Protection Level - Set a per-video override, or leave empty to use the site-wide default from Settings.
- None - No protection for this video.
- Basic - Right-click disabled, source URL hidden.
- Standard - Basic plus dynamic watermark and developer-tools detection.
- Strict - Standard plus keyboard shortcut blocking and a fullscreen watermark.
Access Role (optional) - Restrict playback to a specific WordPress role. Leave blank to allow all logged-in users.
Per-video player controls - Override global player defaults for this video: speed control, sticky player, keyboard shortcuts, playback resume, and end screen.
Click Save. The video is now in your library.
Note on platform API features: the free plugin plays embedded videos from YouTube, Vimeo, Wistia, and Bunny via their normal iframes, with the MediaShield wrapper around them. Browsing, importing, or uploading through a platform’s own API requires MediaShield Pro.
Step 2 - Embed the video
Section titled “Step 2 - Embed the video”Once the video is in your library, you have three ways to embed it on a page or post.
Block editor (Gutenberg)
Section titled “Block editor (Gutenberg)”In the block inserter, search for MediaShield Video. The block opens a video picker where you select the video you just created. You can also paste a fresh video URL directly into the block to create a library entry on the fly. The editor shows a live preview. The frontend output includes the player, watermark, session tracking, and the login overlay when required.
Shortcode
Section titled “Shortcode”Drop this into post content, a page builder widget, or any text area:
[mediashield id=42]Replace 42 with the ID number of your video. You can find the ID in the video list - it appears as the post ID in the edit URL. Invalid or unpublished IDs render nothing.
“My Videos” shortcode
Section titled ““My Videos” shortcode”Build a member dashboard or course completion page with:
[mediashield_my_videos]This renders a grid of every video the current logged-in user has watched, with completion progress bars. It shows nothing for visitors who are not logged in.
Step 3 - Test the embed
Section titled “Step 3 - Test the embed”Open the page in a browser where you are logged in. You should see:
- The video player with the protection layer
- A watermark overlay showing your display name and IP address (if protection level is Standard or higher)
- The “Protected by MediaShield” badge (if enabled in Settings)
Watch the video for at least 30 seconds, then check MediaShield > Dashboard. You’ll see the session counted and the activity chart updated.
Setting a thumbnail
Section titled “Setting a thumbnail”Platform videos (YouTube, Vimeo, Wistia, Bunny) - MediaShield pulls the poster the platform generated and sets it as the WordPress Featured Image when the video is saved. Nothing to do.
Self-hosted videos - MediaShield does not auto-generate a thumbnail from your uploaded file. Set the Featured Image on the video edit screen manually. That image is used as the poster frame in the player, video lists, blocks, and playlists.
Next steps
Section titled “Next steps”- Settings Overview - tune protection, player, and access control
- Shortcodes and Blocks - full embed reference
- Watermarks - how the watermark works
- Analytics and Milestones - reading the dashboard