

Resume Builder - Candidate Guide
This guide explains how candidates use the Resume Builder to create and manage their resumes.
Accessing the Resume Builder
Section titled “Accessing the Resume Builder”From the Candidate Dashboard:
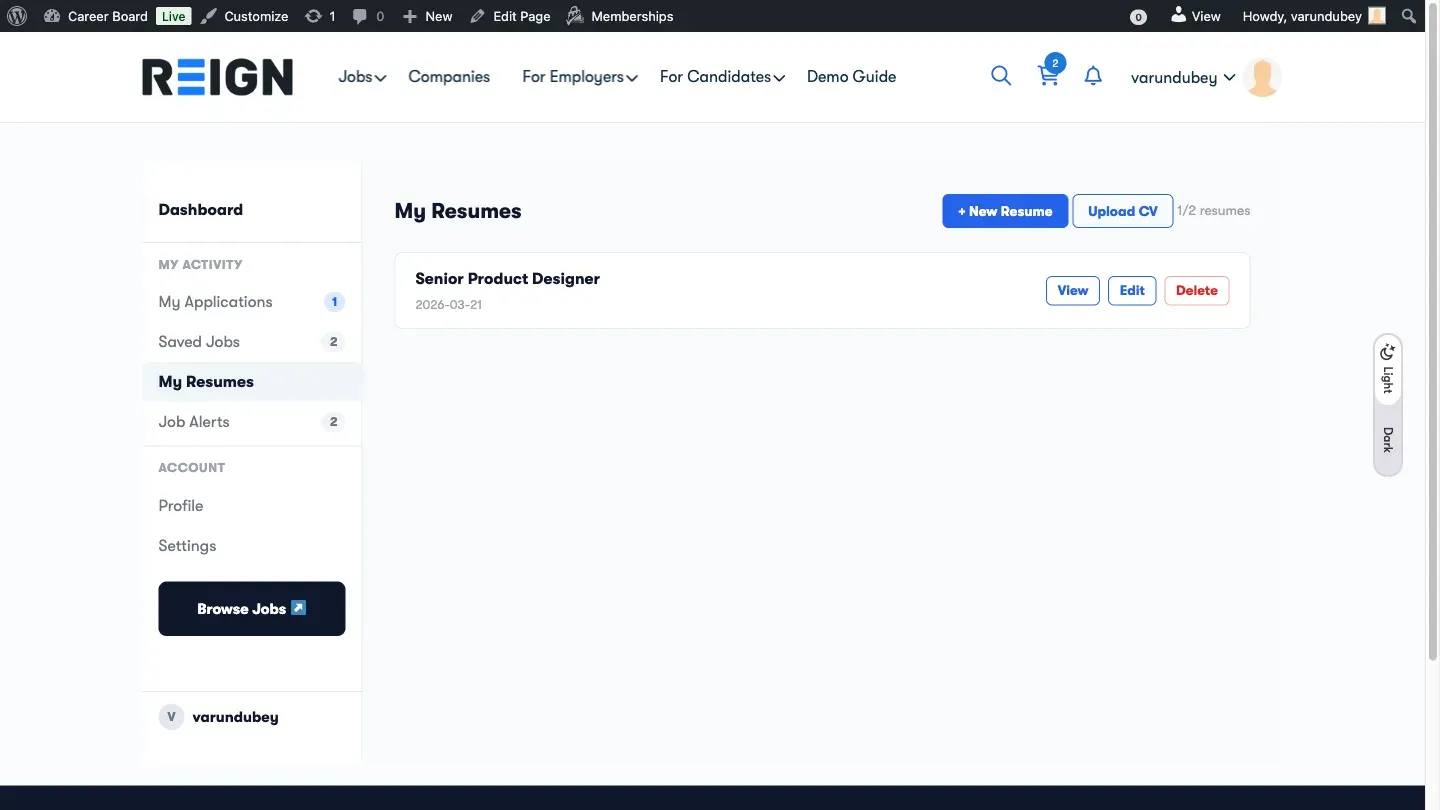
- Click the My Resumes tab
- Click Create New Resume - enter a title (e.g., “Software Engineer Resume”) and click Save
- Click Edit on any existing resume
The Resume Builder page opens with your resume loaded.
Creating a New Resume
Section titled “Creating a New Resume”When you create a resume, you give it a name. This is just for your own reference - the name appears in your dashboard list and is not visible to employers.
The Resume Builder Interface
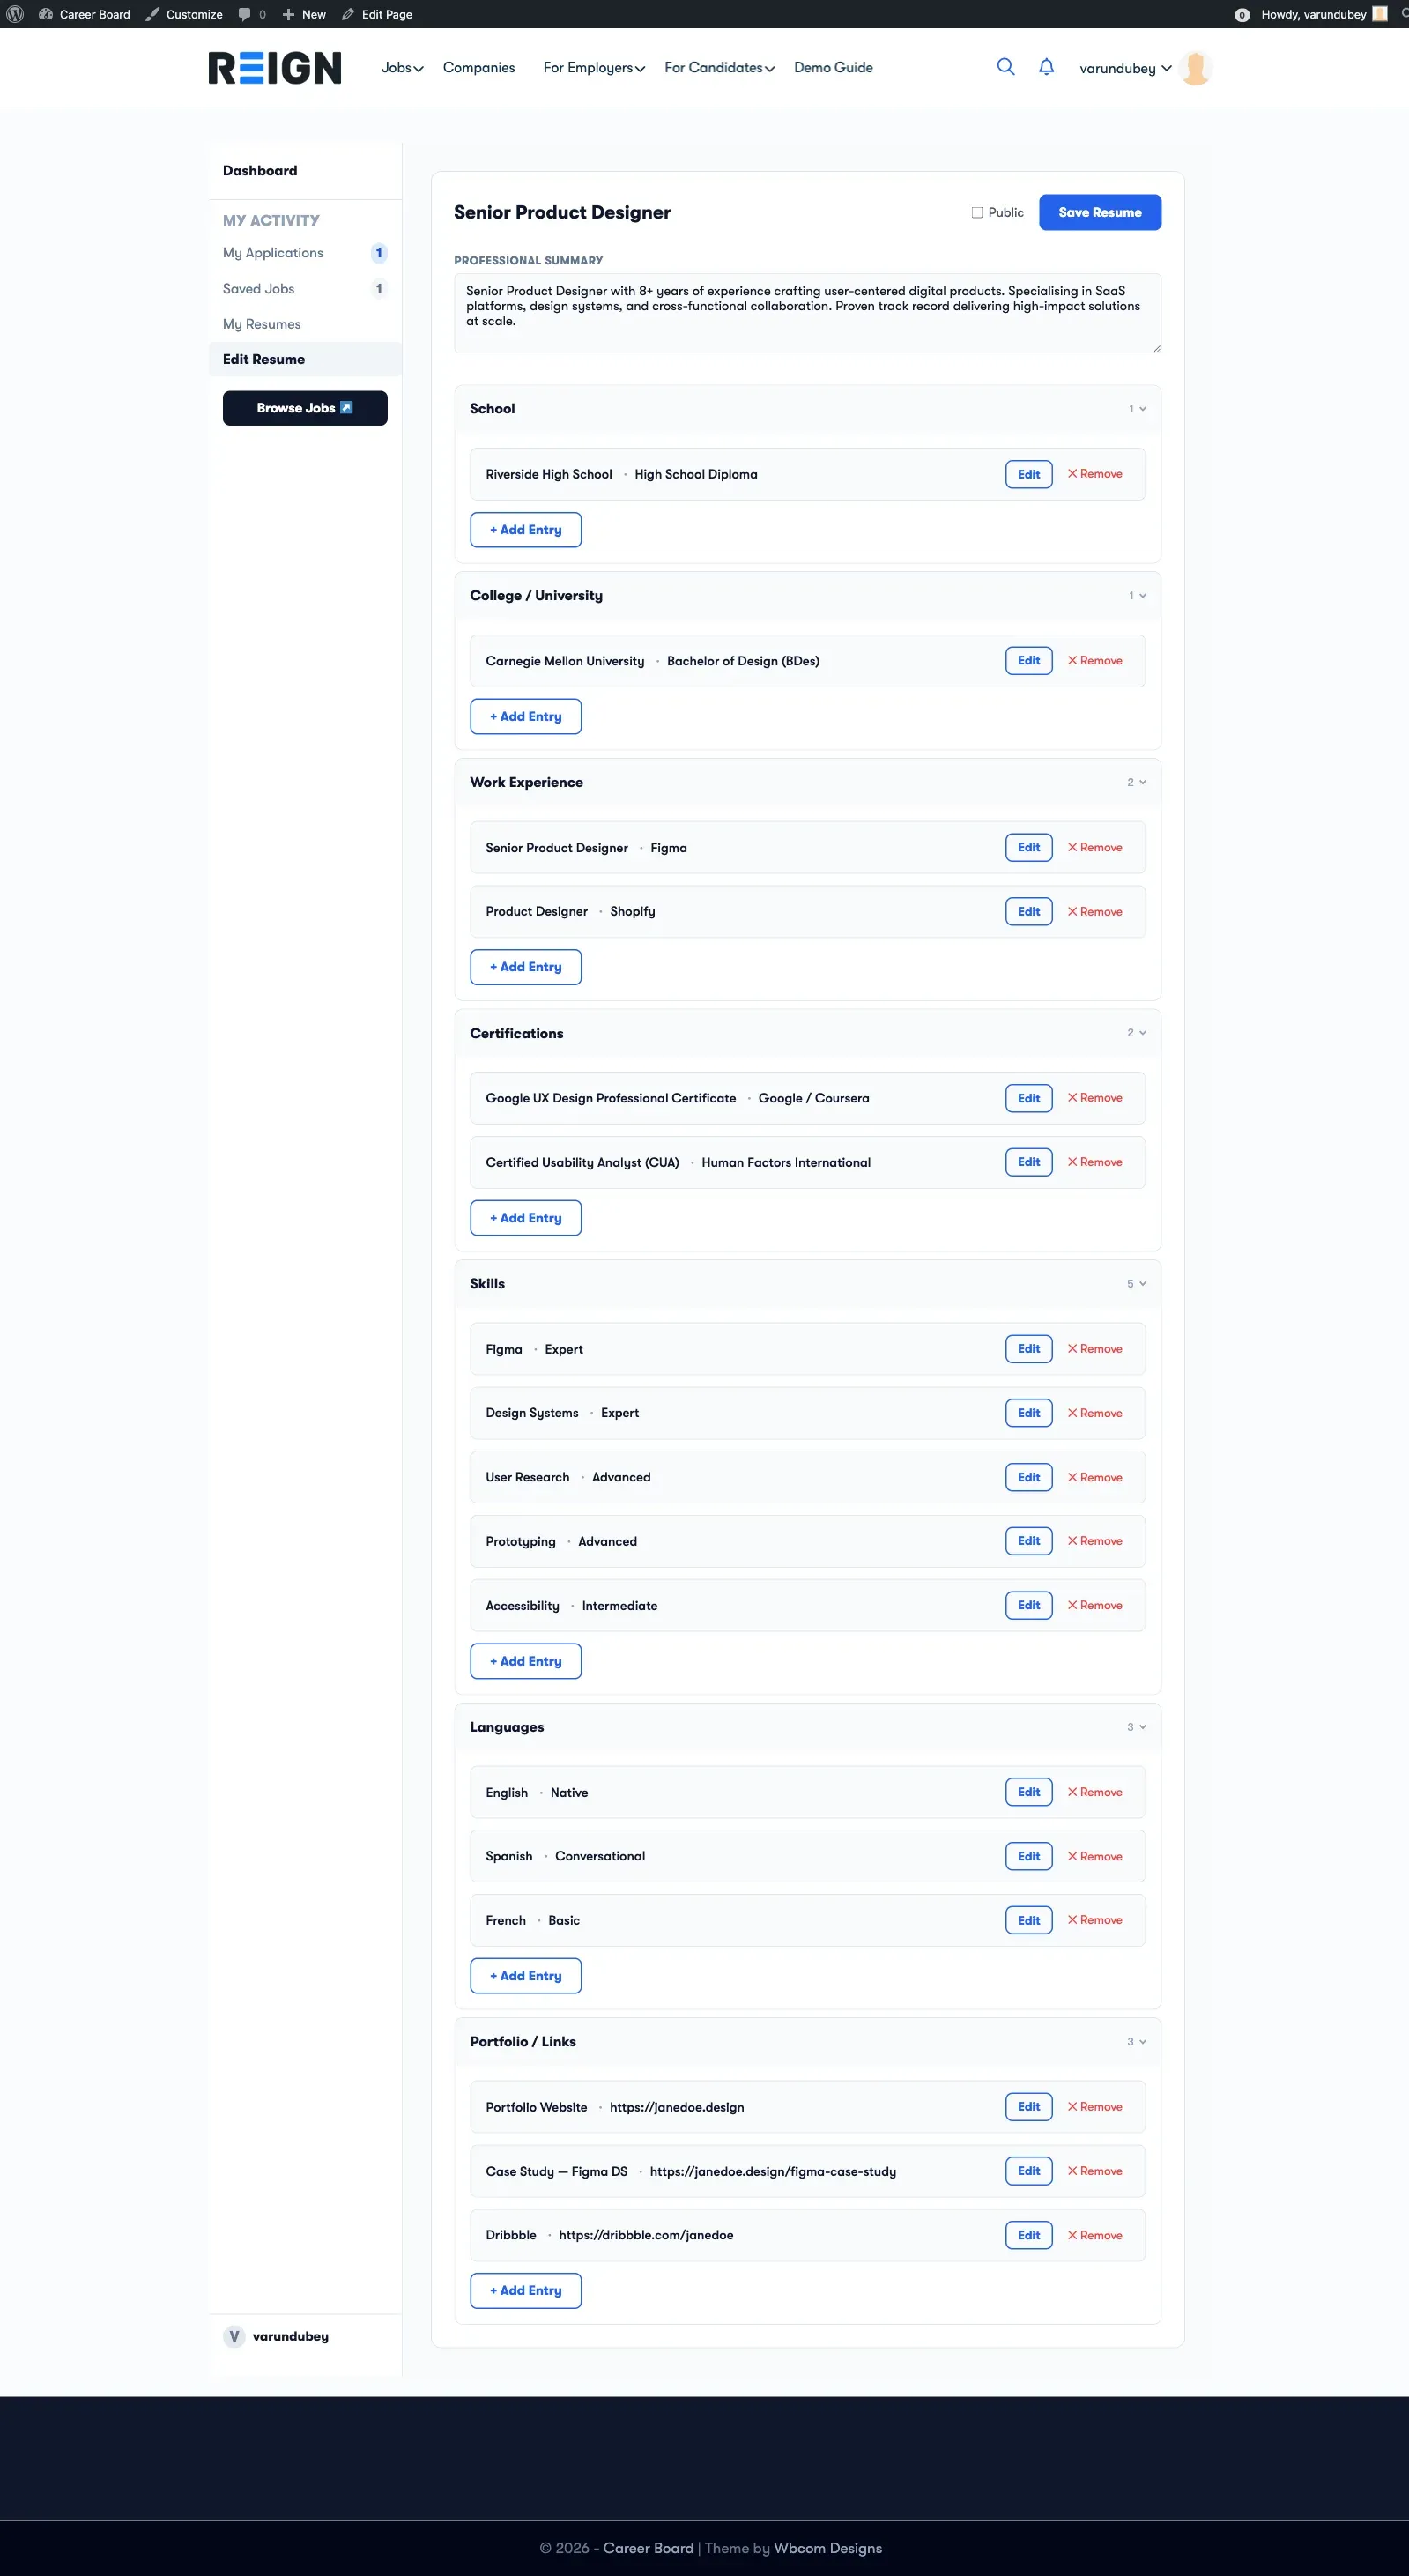
Section titled “The Resume Builder Interface”The builder is organized into collapsible sections. Click any section header to expand it.
Professional Summary
Section titled “Professional Summary”The summary is a free-text field at the top of the builder. Write a short 2-4 sentence overview of your background and goals.
Adding Entries (Experience, Education, etc.)
Section titled “Adding Entries (Experience, Education, etc.)”- Open any section (e.g., Work Experience)
- Click Add Entry - the section opens and the new entry enters inline-edit mode
- Fill in the fields
- Click Done to collapse the entry back to a compact row
The entry appears as a compact row. Click the row to expand and edit it again. You do not click a per-entry Save button - the builder saves your changes automatically (see Saving the Resume).
Entry Fields
Section titled “Entry Fields”Work Experience:
- Job Title (required)
- Company (required)
- Employment Type (e.g., Full-time, Contract)
- Location
- Start Date / End Date
- “Currently working here” checkbox (hides End Date)
- Description
- Skills Used
School Education:
- School Name (required)
- Certificate
- Field of Study
- Start Date / End Date
- Grade
- Description
College / University:
- Institution (required)
- Degree Type (required)
- Field of Study
- Start Date / End Date
- GPA
- Description
- Achievements
Skills:
- Skill name (required)
- Proficiency level (optional: Beginner, Intermediate, Advanced, Expert)
Languages:
- Language name (required)
- Proficiency (e.g., Native, Fluent, Conversational)
Certifications:
- Certificate name (required)
- Issuing organization
- Issue date
- Expiry date
- Credential ID
- Credential URL
Portfolio / Links:
- URL (required)
- Label (e.g., “Portfolio”, “GitHub”)
Removing an Entry
Section titled “Removing an Entry”Click Remove on any entry. You will be asked to confirm before it’s deleted.
Saving the Resume
Section titled “Saving the Resume”The Resume Builder saves in two ways, so your work is never lost:
- Autosave - adding an entry, removing an entry, or finishing an inline edit schedules a debounced autosave a moment later.
- Save Resume button - the builder header has a Save Resume button you can click at any time to save immediately.
While a save is in progress the button reads Saving…, and a “Saved” confirmation appears once it completes. Both paths write the full resume to the same endpoint (PUT /wcb/v1/resumes/{id}).
Deleting a Resume
Section titled “Deleting a Resume”- Go to Candidate Dashboard → My Resumes
- Click the Delete icon on the resume you want to remove
- Confirm in the prompt
Deleted resumes are removed permanently.
Visibility Toggle
Section titled “Visibility Toggle”Each resume has a Public toggle in the builder header. When it is off (the default, “Private”), only you and the employers you apply to can see the resume. Turning it on publishes your resume profile at a public /resume/{slug}/ URL and lists it in the site’s candidate directory (the Find Candidates page).
The site owner can require visitors to sign in before browsing the directory or opening a profile (Settings → Resumes), but your per-resume toggle is always the first gate - a resume you keep private never appears, regardless of site settings.