

WooCommerce Integration
Advanced Username Manager integrates seamlessly with WooCommerce, adding a dedicated “Change Username” tab in the My Account page. This allows your customers to manage their login usernames directly from their WooCommerce account dashboard.
What is WooCommerce Integration?
Section titled “What is WooCommerce Integration?”The WooCommerce integration adds a “Change Username” tab to the WooCommerce My Account navigation menu. Customers can access this feature alongside other account management options like Orders, Downloads, and Account Details.
Compatible With:
- WooCommerce 4.0 or higher
Key Features
Section titled “Key Features”- My Account Integration - Username change tab appears naturally in WooCommerce My Account menu
- Customer-Friendly - Works entirely from the frontend, no admin access needed
- Consistent Navigation - Follows WooCommerce’s standard account navigation pattern
- Seamless Experience - Uses WooCommerce’s styling and layout
- Role Support - Works with WooCommerce Customer role and other user roles
- Security - Same security features as other account management functions
Enabling WooCommerce Integration
Section titled “Enabling WooCommerce Integration”Step 1: Verify WooCommerce is Active
Section titled “Step 1: Verify WooCommerce is Active”- Go to Plugins → Installed Plugins
- Ensure WooCommerce is Active
- Verify WooCommerce is properly configured

Step 2: Enable Username Change in WooCommerce
Section titled “Step 2: Enable Username Change in WooCommerce”- Navigate to WB Plugins → Advanced Username Manager
- Click the General Settings tab
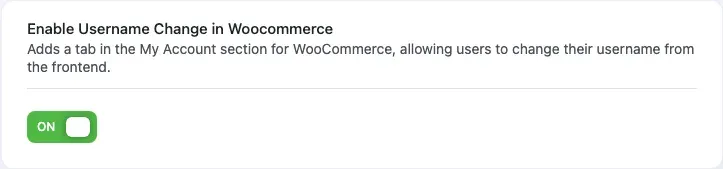
- Find the option “Enable Username Change in WooCommerce”
- Toggle the switch to ON (green)
- Click Save Changes
Step 3: Configure User Roles
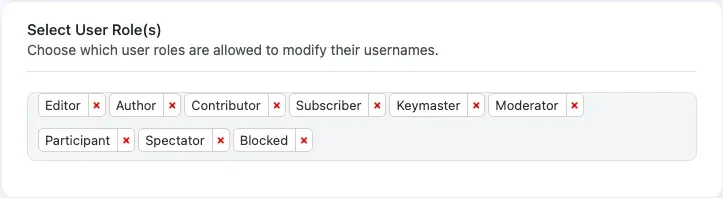
Section titled “Step 3: Configure User Roles”- On the same General Settings page, find “Select User Role(s)”
- Select the Customer role (and any other roles you want to allow)
- Configure cooldown period and username length requirements
- Click Save Changes
See the General Settings documentation for detailed configuration instructions.
How Customers Access Username Change
Section titled “How Customers Access Username Change”Via My Account Page
Section titled “Via My Account Page”Customers access the username change feature through their WooCommerce account:
- Log in to the site
- Navigate to My Account page (usually at
/my-account/) - Click Change Username in the navigation menu
- The username change form appears
Menu Position
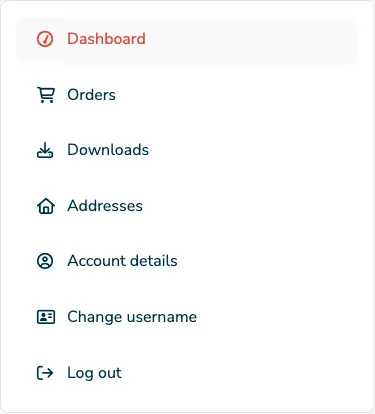
Section titled “Menu Position”The “Change Username” tab is automatically inserted in the My Account menu right after the “Account Details” option, making it easy to find.
Default Menu Order:
- Dashboard
- Orders
- Downloads
- Addresses
- Account Details
- Change Username ← Added here
- Logout
URL Structure:
https://example.com/my-account/change-username/The Username Change Page
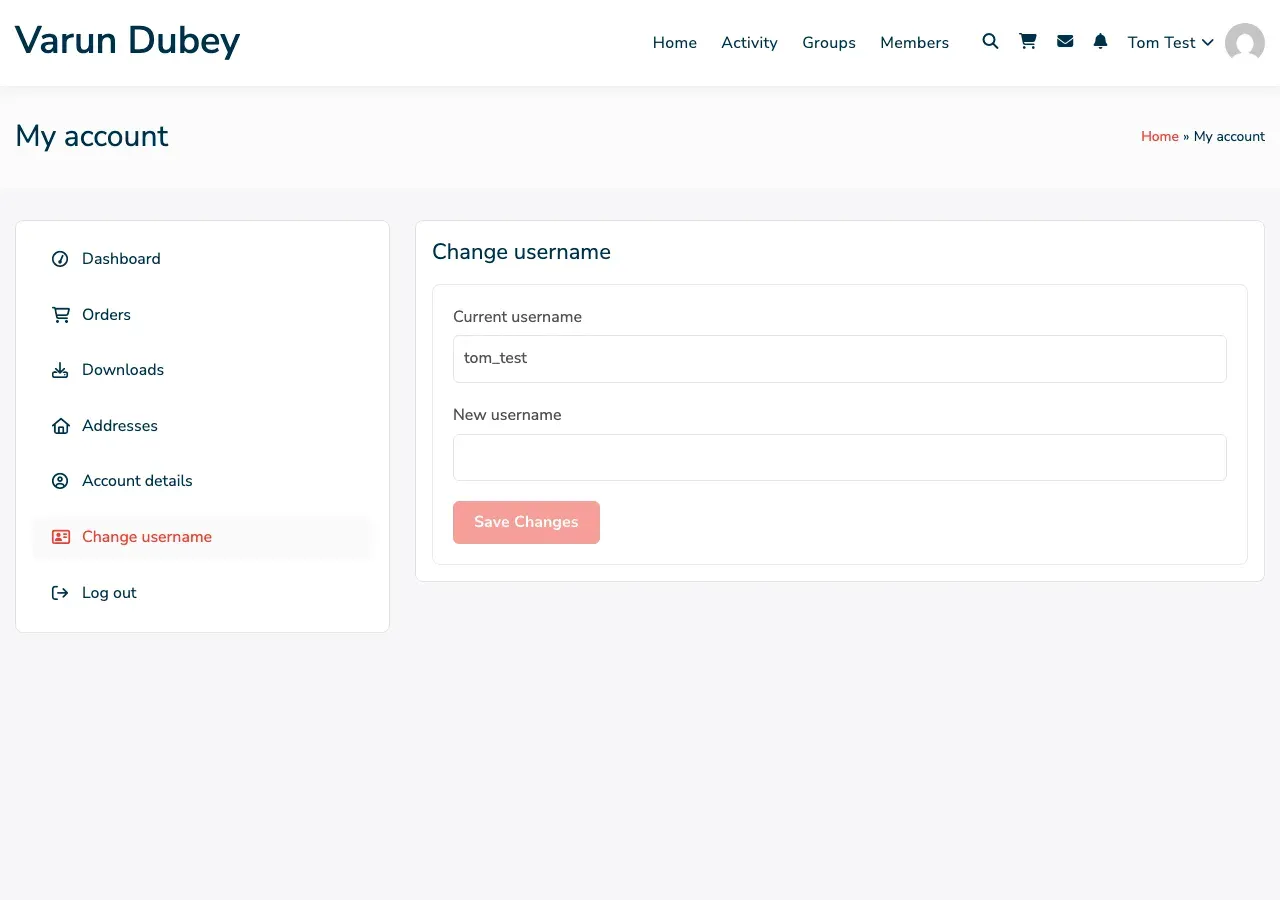
Section titled “The Username Change Page”When customers click the Change Username tab, they see a dedicated page:
Page Elements
Section titled “Page Elements”- Page Heading - “Change username” (matches WooCommerce styling)
- Username Change Form - The complete form with all features
- WooCommerce Layout - Uses standard My Account page layout
- Responsive Design - Works on mobile, tablet, and desktop
The Form
Section titled “The Form”The form includes all the same features as the shortcode and BuddyPress versions:
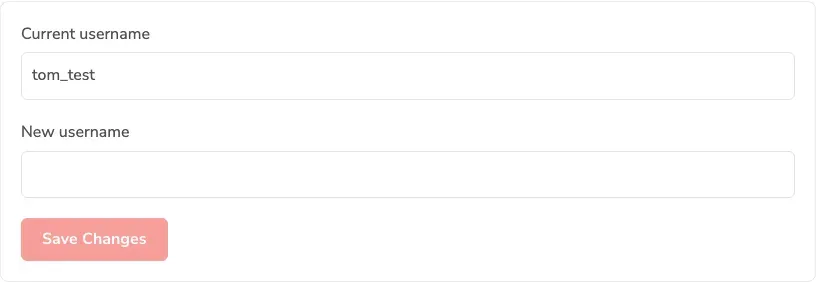
Form Elements:
- Current Username - Read-only field showing current login name
- New Username - Input field for desired username
- Real-Time Validation - Instant feedback on username availability
- Username Suggestions - Alternative options if username is taken
- Save Changes Button - Submit the username change
See the Username Availability documentation for details on how validation works.
Customer Experience
Section titled “Customer Experience”Step-by-Step for Customers
Section titled “Step-by-Step for Customers”Step 1: Access My Account
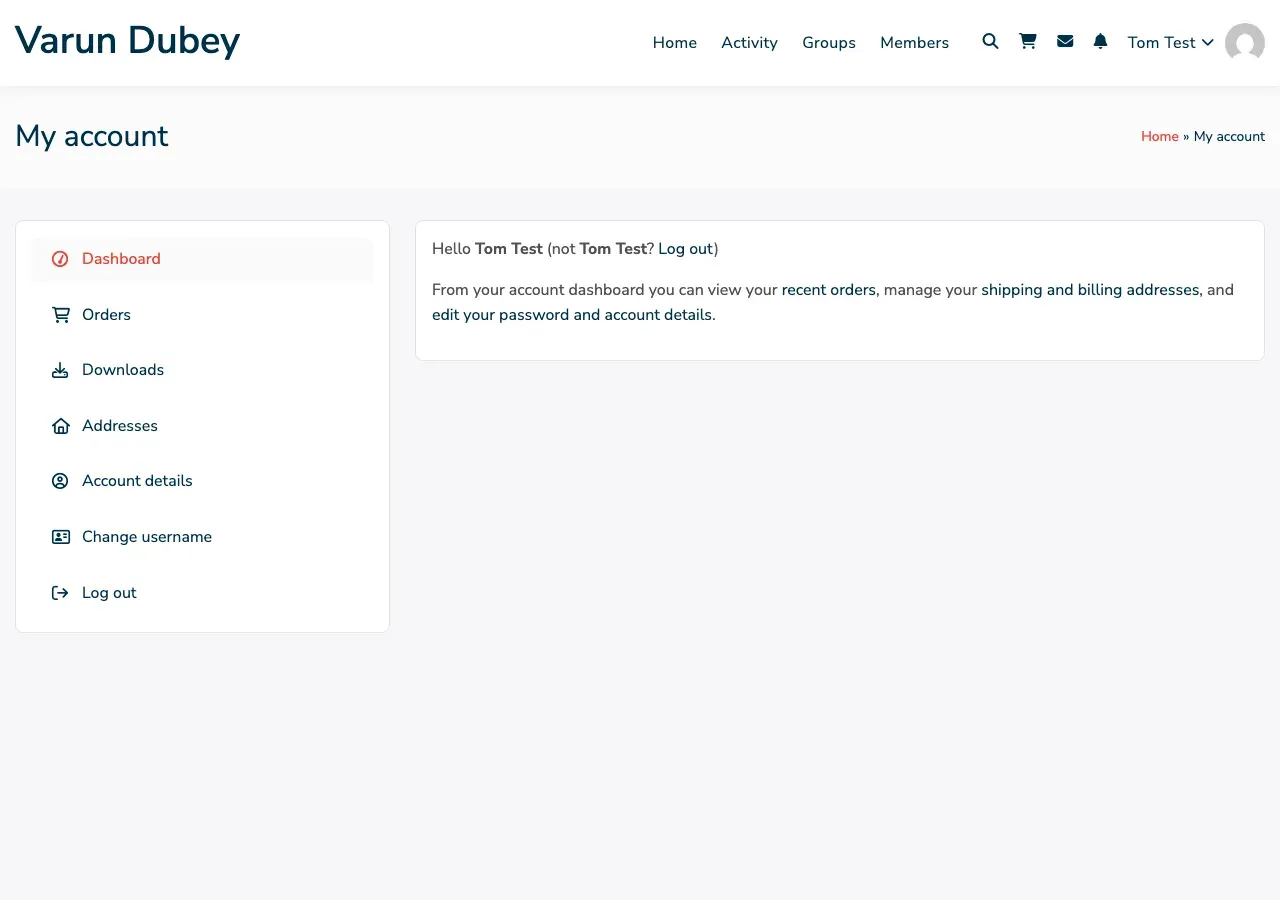
- Log in to the website
- Click My Account in the header/menu
- Or go directly to
/my-account/
Step 2: Click Change Username
- Find Change Username in the left navigation menu
- Click on it to open the username change page
Step 3: Enter New Username
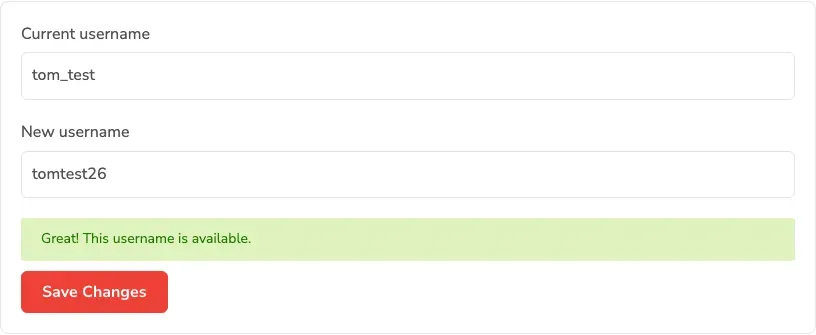
- The current username is displayed (read-only)
- Click in the New Username field
- Type the desired new username
- Watch for real-time availability feedback
Step 4: Validate and Save
- Ensure username is available (green checkmark)
- Check that it meets length requirements
- Click Save Changes button
- Wait for confirmation
Step 5: Success
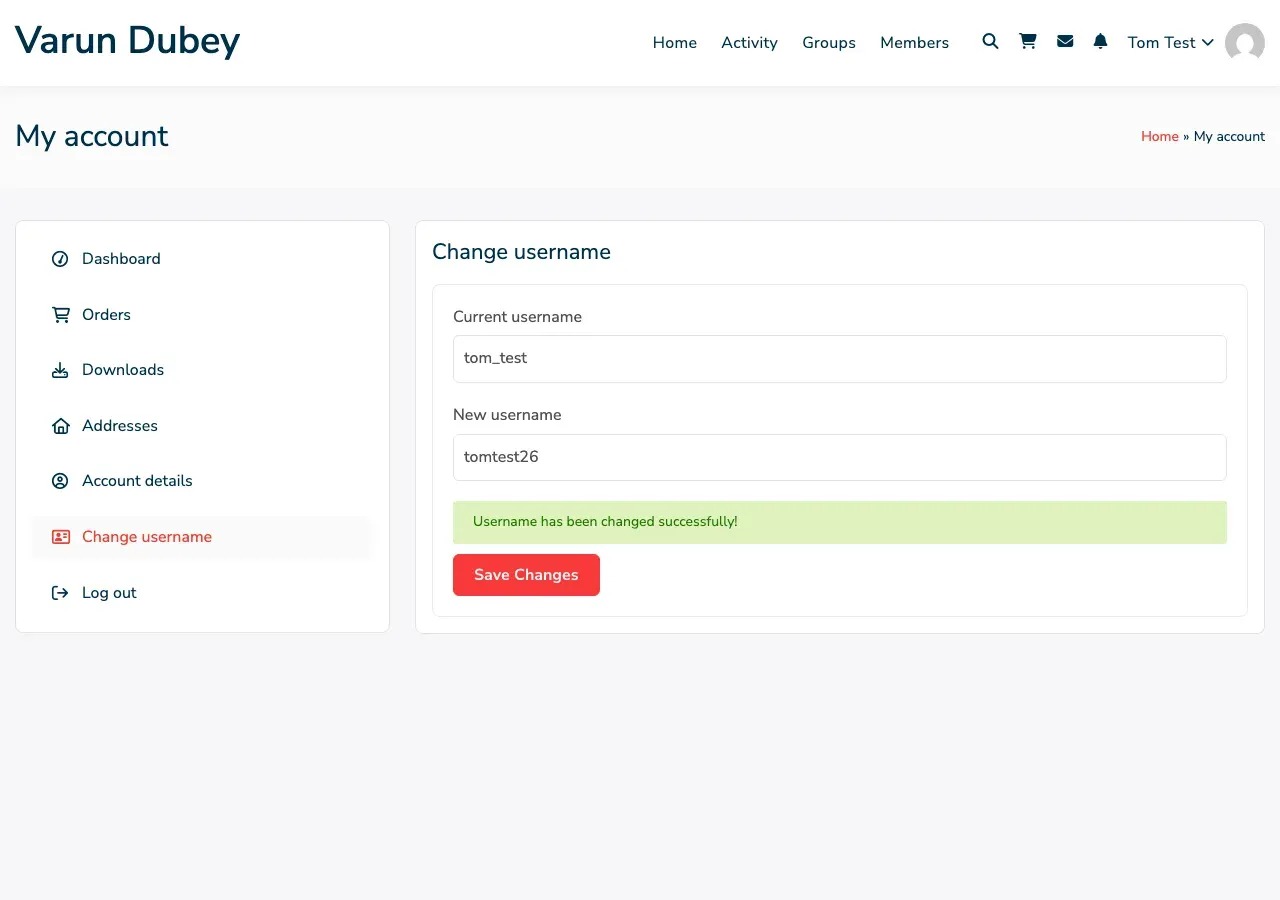
- Success message appears: “Username has been changed successfully!”
- Customer receives a confirmation email
- Customer stays logged in with new credentials
- Cooldown period begins
Email Notification
Section titled “Email Notification”After changing their username, customers receive an email:
Subject:
“Your Username Has Been Successfully Updated!”
Email Content:
Hello John,
We’re writing to let you know that your username on Example Store has been successfully updated.
Your new username is: john_customer_2026
If you did not request this change, please contact our support team immediately to secure your account.
Thank you for being part of Example Store!
Customers can customize this email using filter hooks. See the developer documentation for details.
WooCommerce Styling Integration
Section titled “WooCommerce Styling Integration”The plugin automatically adapts to your WooCommerce theme’s styling:
Automatic Styling
Section titled “Automatic Styling”- Matches My Account Layout - Uses WooCommerce’s standard account page structure
- Responsive Design - Works on all device sizes
- Theme Compatibility - Inherits styling from your active WooCommerce theme
- Consistent Buttons - Save Changes button matches WooCommerce button styles
- Form Fields - Input fields use WooCommerce form styling
Custom Styling
Section titled “Custom Styling”If you need to customize the appearance, you can add custom CSS:
/* Style the WooCommerce username change form */.woocommerce-MyAccount-content h3 {    /* Heading styles */}
.woocommerce-MyAccount-content .aum-standard-form {    /* Form container styles */}
.woocommerce-MyAccount-content .aum-input-field {    /* Input field container styles */}
Add these styles to Appearance → Customize → Additional CSS or your child theme’s stylesheet.
WooCommerce Customer Role
Section titled “WooCommerce Customer Role”The WooCommerce integration works perfectly with the WooCommerce Customer role:
What is the Customer Role?
Section titled “What is the Customer Role?”- Default WooCommerce Role - Automatically assigned when someone creates a WooCommerce account
- Shop Permissions - Can view products, place orders, and manage their account
- Limited Admin Access - Cannot access WordPress admin dashboard
Enabling Username Changes for Customers
Section titled “Enabling Username Changes for Customers”To allow WooCommerce customers to change their usernames:
- Go to General Settings
- Under “Select User Role(s)”, choose Customer
- Click Save Changes
Now all WooCommerce customers can change their usernames from My Account.
Common WooCommerce Scenarios
Section titled “Common WooCommerce Scenarios”Scenario 1: Online Store with Customer Accounts
Section titled “Scenario 1: Online Store with Customer Accounts”Use Case: E-commerce store where customers create accounts to track orders
Configuration:
- Enable WooCommerce username changes
- Allow Customer and Subscriber roles
- Use 15-day cooldown for balance
- Standard length limits (5-12 characters)
- Send email confirmations
Benefits:
- Customers can update their account information
- Improves customer satisfaction
- Reduces support requests about usernames
Scenario 2: Membership Store
Section titled “Scenario 2: Membership Store”Use Case: WooCommerce store selling memberships or subscriptions
Configuration:
- Enable WooCommerce username changes
- Allow Customer role and any custom membership roles
- Use 30-day cooldown to prevent frequent changes
- Minimum 6 characters for professionalism
Benefits:
- Members feel in control of their accounts
- Professional account management experience
- Stable usernames for membership tracking
Scenario 3: Multi-Role Store
Section titled “Scenario 3: Multi-Role Store”Use Case: Store with customers, wholesale buyers, and affiliates
Configuration:
- Enable WooCommerce username changes
- Select Customer, Wholesale Customer, and Affiliate roles
- Use 15-day cooldown
- Set role-specific restrictions if needed
Benefits:
- All user types can manage their usernames
- Flexibility for different account types
- Unified account management experience
Automatic Re-login After Username Change
Section titled “Automatic Re-login After Username Change”When customers change their username through WooCommerce, they automatically stay logged in:
How It Works
Section titled “How It Works”- Customer submits username change
- Plugin updates the username in the database
- Plugin clears old authentication cookies
- Plugin sets new authentication cookies with new username
- Customer remains logged in seamlessly
Remember Me Support
Section titled “Remember Me Support”The plugin preserves the “Remember Me” functionality:
- If customer had “Remember Me” checked, it’s preserved
- Session duration remains the same
- No need to log in again
Benefits
Section titled “Benefits”- Seamless customer experience
- No interruption to shopping or browsing
- Customers can continue to checkout
- Reduces friction and confusion
Cooldown Period in WooCommerce
Section titled “Cooldown Period in WooCommerce”The cooldown period applies to WooCommerce customers just like other users:
How It Works
Section titled “How It Works”If a customer tries to change their username before the cooldown expires:
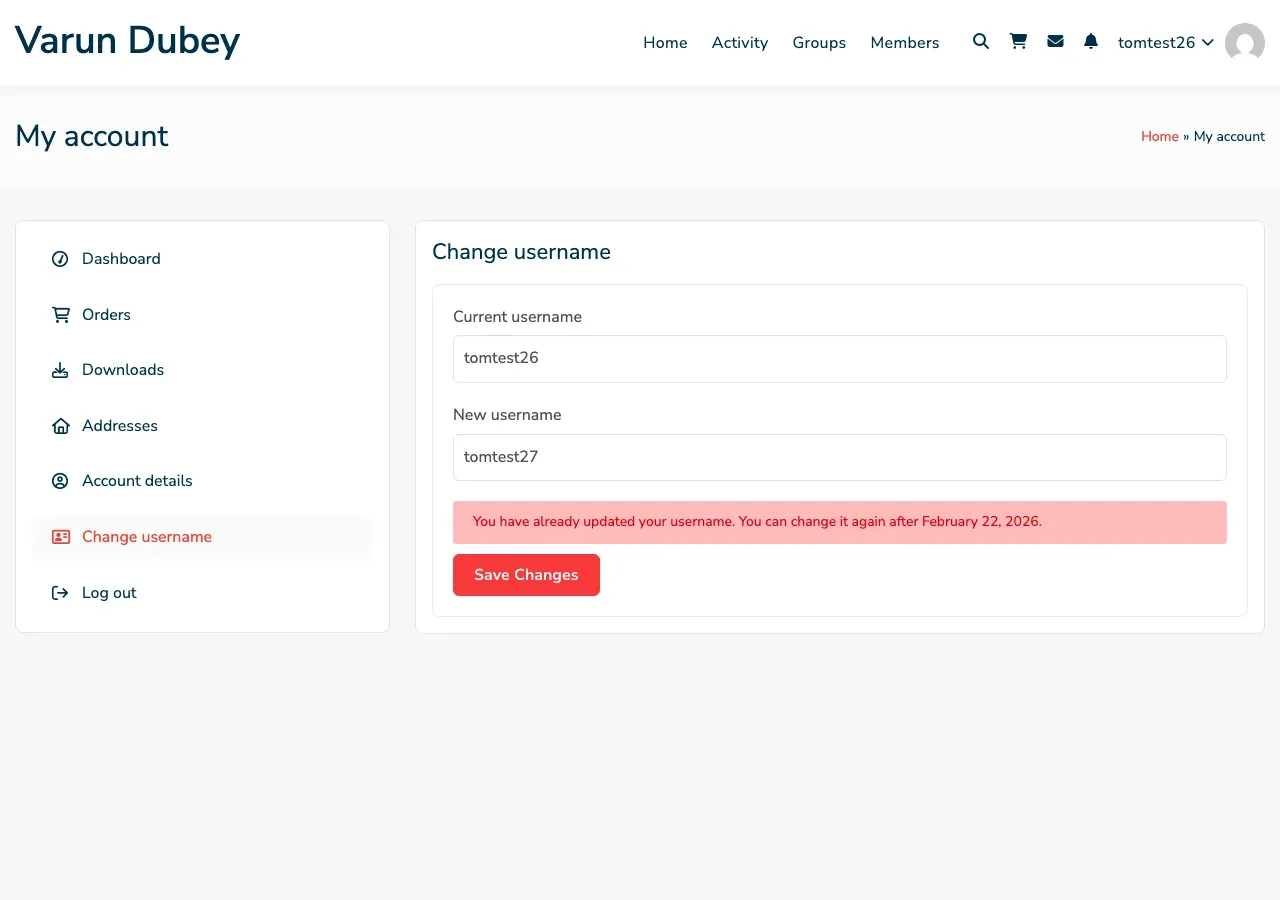
Message Displayed:
“You have already updated your username. You can change it again after February 22, 2026.”
Cooldown Configuration
Section titled “Cooldown Configuration”Set the cooldown period in General Settings:
- 7 Days - Once per week
- 15 Days - Twice per month
- 30 Days - Once per month
See General Settings for configuration details.
Rewrite Rules and Permalinks
Section titled “Rewrite Rules and Permalinks”The plugin automatically registers a rewrite endpoint for the “Change Username” page:
Endpoint Registration
Section titled “Endpoint Registration”The endpoint change-username is registered with WordPress rewrite rules:
add_rewrite_endpoint( 'change-username', EP_PAGES );Flushing Permalinks
Section titled “Flushing Permalinks”If the “Change Username” page shows a 404 error:
- Go to Settings → Permalinks
- Click Save Changes (don’t change anything)
- This flushes the rewrite rules
- Try accessing the page again
Custom Permalinks
Section titled “Custom Permalinks”The endpoint works with any WordPress permalink structure:
- Plain:
?page_id=123&change-username - Post Name:
/my-account/change-username/ - Custom: Works with any structure
Security Considerations
Section titled “Security Considerations”The WooCommerce integration includes the same security features as other parts of the plugin:
Nonce Verification
Section titled “Nonce Verification”- Every form submission includes a WordPress nonce token
- Prevents CSRF (Cross-Site Request Forgery) attacks
- Validates requests are from authentic forms
Role-Based Access Control
Section titled “Role-Based Access Control”- Only users with allowed roles can change usernames
- Customers can only change their own username
- Administrators can change any username
Input Validation
Section titled “Input Validation”- All usernames are sanitized before processing
- Prevents SQL injection and XSS attacks
- Validates against WordPress username rules
Rate Limiting
Section titled “Rate Limiting”- Cooldown period prevents abuse
- Stops rapid username changes
- Protects against malicious behavior
Troubleshooting WooCommerce Integration
Section titled “Troubleshooting WooCommerce Integration”Change Username Tab Not Showing
Section titled “Change Username Tab Not Showing”Problem: The tab doesn’t appear in My Account menu.
Solution:
- Verify WooCommerce is active
- Check that “Enable Username Change in WooCommerce” is enabled in General Settings
- Ensure the Customer role is selected in “Select User Role(s)”
- Go to Settings → Permalinks and click Save Changes
- Clear site cache
- Log out and log back in
404 Error on Change Username Page
Section titled “404 Error on Change Username Page”Problem: Clicking “Change Username” shows a 404 page not found error.
Solution:
- Go to Settings → Permalinks
- Click Save Changes without changing anything (flushes rewrite rules)
- Clear all caches
- Try accessing the page again
- Deactivate and reactivate the plugin if issue persists
Form Not Displaying
Section titled “Form Not Displaying”Problem: Page loads but form doesn’t appear.
Solution:
- Check if you’re logged in
- Verify your user role has permission
- Check for JavaScript errors in browser console
- Disable conflicting plugins
- Test with a default WordPress theme
Save Button Not Working
Section titled “Save Button Not Working”Problem: Can’t click Save Changes or nothing happens.
Solution:
- Check browser console for JavaScript errors
- Ensure username meets validation requirements
- Verify username is available
- Disable browser extensions
- Try a different browser
Styling Looks Broken
Section titled “Styling Looks Broken”Problem: Form appears unstyled or doesn’t match WooCommerce.
Solution:
- Clear browser cache
- Clear site cache
- Check if WooCommerce styles are loading
- Verify no CSS conflicts with your theme
- Try disabling customizer plugins temporarily
Testing WooCommerce Integration
Section titled “Testing WooCommerce Integration”Test Checklist
Section titled “Test Checklist”After enabling WooCommerce integration, test these scenarios:
- “Change Username” tab appears in My Account menu
- Tab is positioned after Account Details
- Clicking tab loads the username change page
- Form displays correctly with WooCommerce styling
- Current username shows correctly
- Real-time availability check works
- Can successfully change username
- Receive email confirmation
- Stay logged in after change
- Can continue shopping/checkout
- Cooldown prevents immediate second change
- Works on mobile devices
Test Customer Account
Section titled “Test Customer Account”Create a test WooCommerce customer account:
- Register as a new customer
- Place a test order (optional)
- Log in and access My Account
- Test changing the username
- Verify all features work correctly
Related Documentation
Section titled “Related Documentation”- General Settings - Configure WooCommerce integration options
- Username Availability - How real-time validation works
- BuddyPress Integration - Compare with BuddyPress features
- Shortcode Usage - Alternative method using shortcode
- Troubleshooting - Fix common WooCommerce issues