

Admin Overview
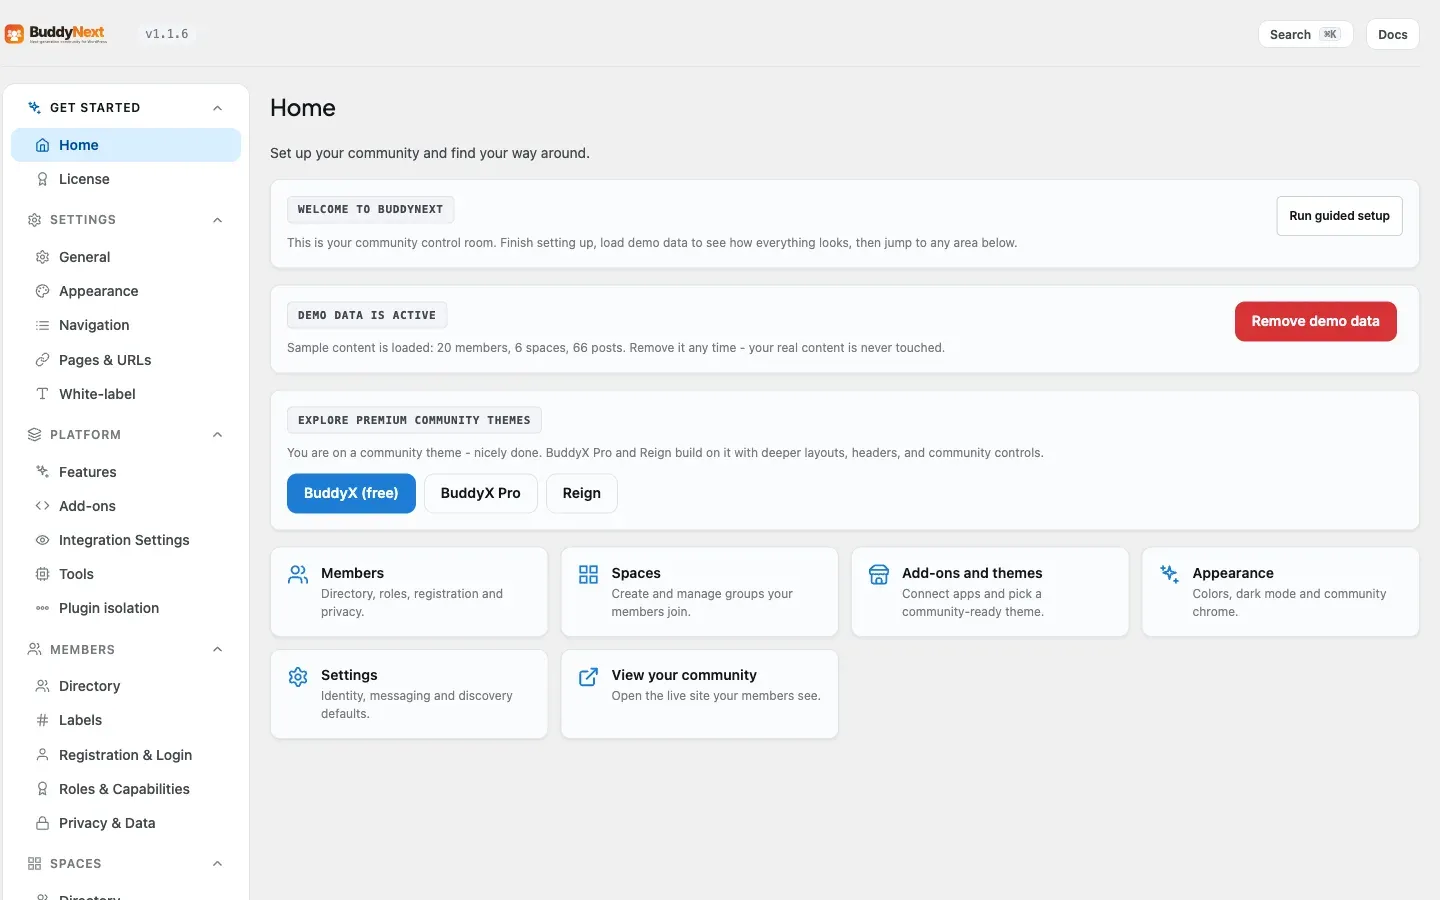
The BuddyNext admin hub is the single place you manage your whole community from. Instead of scattering settings across dozens of unrelated screens, BuddyNext groups every control into labeled sections that follow how you actually run a community: set it up, manage your platform, look after members and spaces, drive engagement, handle notifications, and moderate. This page is your map - find any setting by the job it does.
What it is
Section titled “What it is”Every BuddyNext screen lives under one top-level BuddyNext menu in wp-admin, organized into sections. The sections are ordered from setup through day-to-day operation, and each holds a small, focused set of tabs. The goal is that a new owner can guess where a setting is from its job, and find it on the first try.
Why it is organized this way
Section titled “Why it is organized this way”A community platform has a lot of settings. Listing them flat would be unusable. Grouping them by purpose means you spend less time hunting: branding and pages sit under Settings, anything about people sits under Members, anything about communities sits under Spaces, and so on. Pro features slot into the same sections rather than into a separate menu, so the structure stays the same as your community grows.
Navigation map
Section titled “Navigation map”Tabs marked (Pro) require BuddyNext Pro. Everything else is in the free plugin.
| Section | Tabs | What you configure |
|---|---|---|
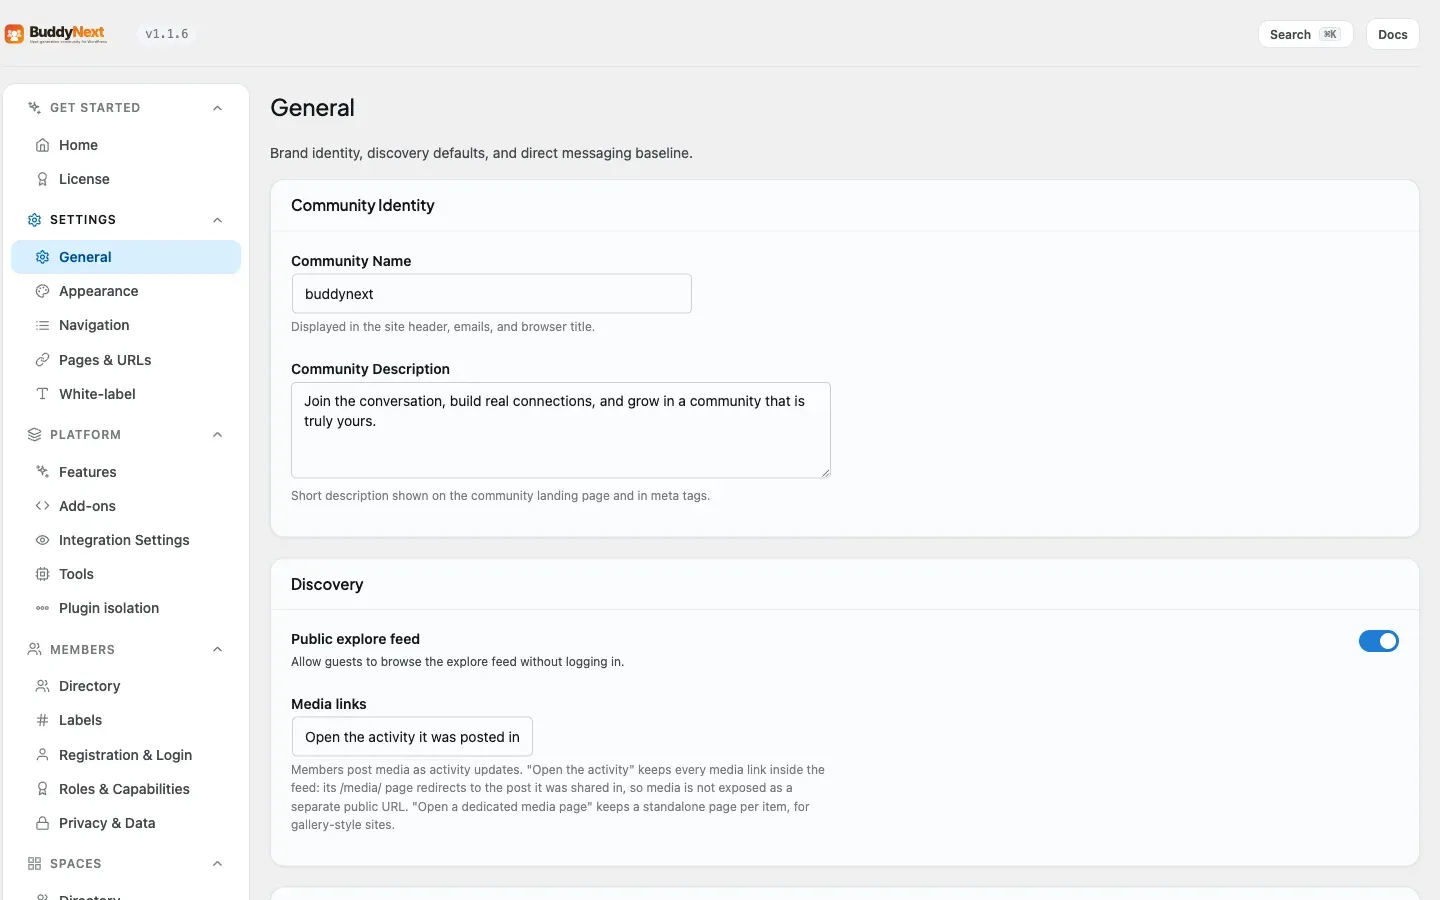
| Settings | General; Appearance; Navigation; Pages & URLs; White-Label (Pro) | Core community name and identity, theme appearance and brand color, the front-end navigation menu, and the URL for each community hub. |
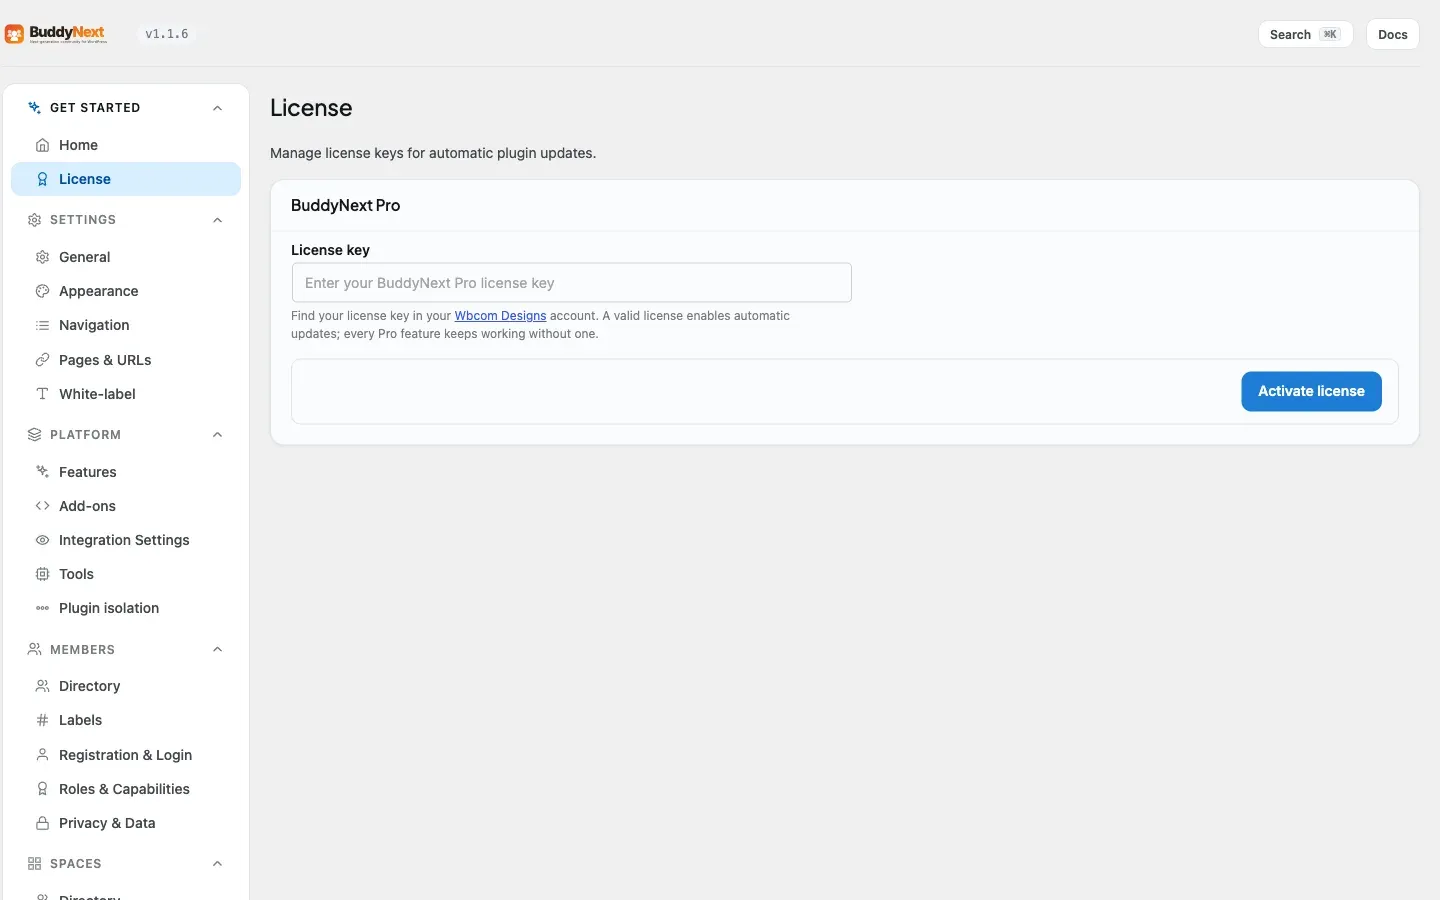
| Get Started | Home; License (Pro) | Find your way around a new install, work through setup, and enter your Pro license key so the plugin receives automatic updates. |
| Platform | Features; Add-ons; Integration Settings; Tools; Plugin isolation; Webhooks | Turn whole features on or off, install and connect companion plugins, control how each integration surfaces, run maintenance tools, choose which other plugins load on community pages, and send outbound webhooks to other systems. |
| Members | Directory; Labels (Pro); Registration; Roles; Privacy | Manage the member directory, apply member labels, set how people register and verify, define roles and capabilities, and set default privacy. |
| Spaces | Directory; Spaces settings | Manage the spaces directory and configure how spaces, categories, and membership work. |
| Engagement | Insights; Announcements; Social; Reactions | View engagement insights, post site-wide announcements, configure social and social-login behavior, and choose which reactions members can use. |
| Notifications | Notifications; Email; Templates; Email Log | Set notification defaults and channels, configure sending email identity, edit the email templates members receive, and review a log of every message sent. |
| Realtime & Push (Pro) | Realtime; Push; Push Preferences | Configure real-time updates, web and mobile push delivery, and the default push preferences for members. |
| Campaigns (Pro) | Broadcasts; Drip; Scheduled Posts; AI Feed | Send broadcast emails, build automated drip sequences, schedule posts, and configure AI feed ranking. |
| Moderation | Controls; Pending; Reports; Suspensions; Appeals | Set moderation policy, review pending content, work the report queue, manage suspensions, and handle member appeals. |
| Moderation Tools | Rules (Pro); AI Moderation (Pro); Bulk (Pro); Moderation Log | Build automatic moderation rules (including banned-word rules), enable AI-assisted moderation, run bulk moderation actions, and read the log of who moderated what. The Moderation Log is free; the other three are Pro. |
| Monetization (Pro) | Plans; Subscriptions; Coupons; Paywall; Payment Gateways | Define paid membership plans, manage subscriptions, issue discount coupons, configure the paywall prompt, and connect payment gateways (Stripe, PayPal, points). |
Note: Sections marked (Pro) and individual (Pro) tabs appear only when BuddyNext Pro is active. With the free plugin alone you see Get Started, Settings, Platform, Members, Spaces, Engagement, Notifications, Moderation and Moderation Tools, with the Pro-only tabs inside them hidden. Free also shows an Upgrade section, which is an upsell rather than a place to configure anything.
Refined in 1.0.4
Section titled “Refined in 1.0.4”The admin had a full quality pass in 1.0.4, so screenshots from earlier versions may look slightly different:
- Every settings screen uses the same full-width card style, with inputs capped at a comfortable reading width.
- The left navigation shows real hierarchy - section labels with their screens nested beneath - and keeps its sidebar layout on iPad.
- Logo and image fields open the WordPress media library with a preview and a Remove button.
- License moved out of Monetization and onto its own tab, so activating updates no longer means hunting through the billing screens. As of 1.1.5 it sits under Get Started.
Dark mode follows your theme (1.0.7)
Section titled “Dark mode follows your theme (1.0.7)”The Appearance tab controls your community’s brand color, and dark mode rides along with it automatically. BuddyNext does not have its own light/dark switch - it follows the toggle your theme already provides. If your site runs BuddyX or Reign, switching that theme’s light/dark toggle switches BuddyNext with it, with no extra setup.
1.0.7 extends dark mode to reach the corners it used to miss: native form controls (inputs, dropdowns, checkboxes), skill chips on profiles, and leaderboard badges all now follow the theme instead of staying light in a dark layout.
Shaping the menus: Settings > Navigation
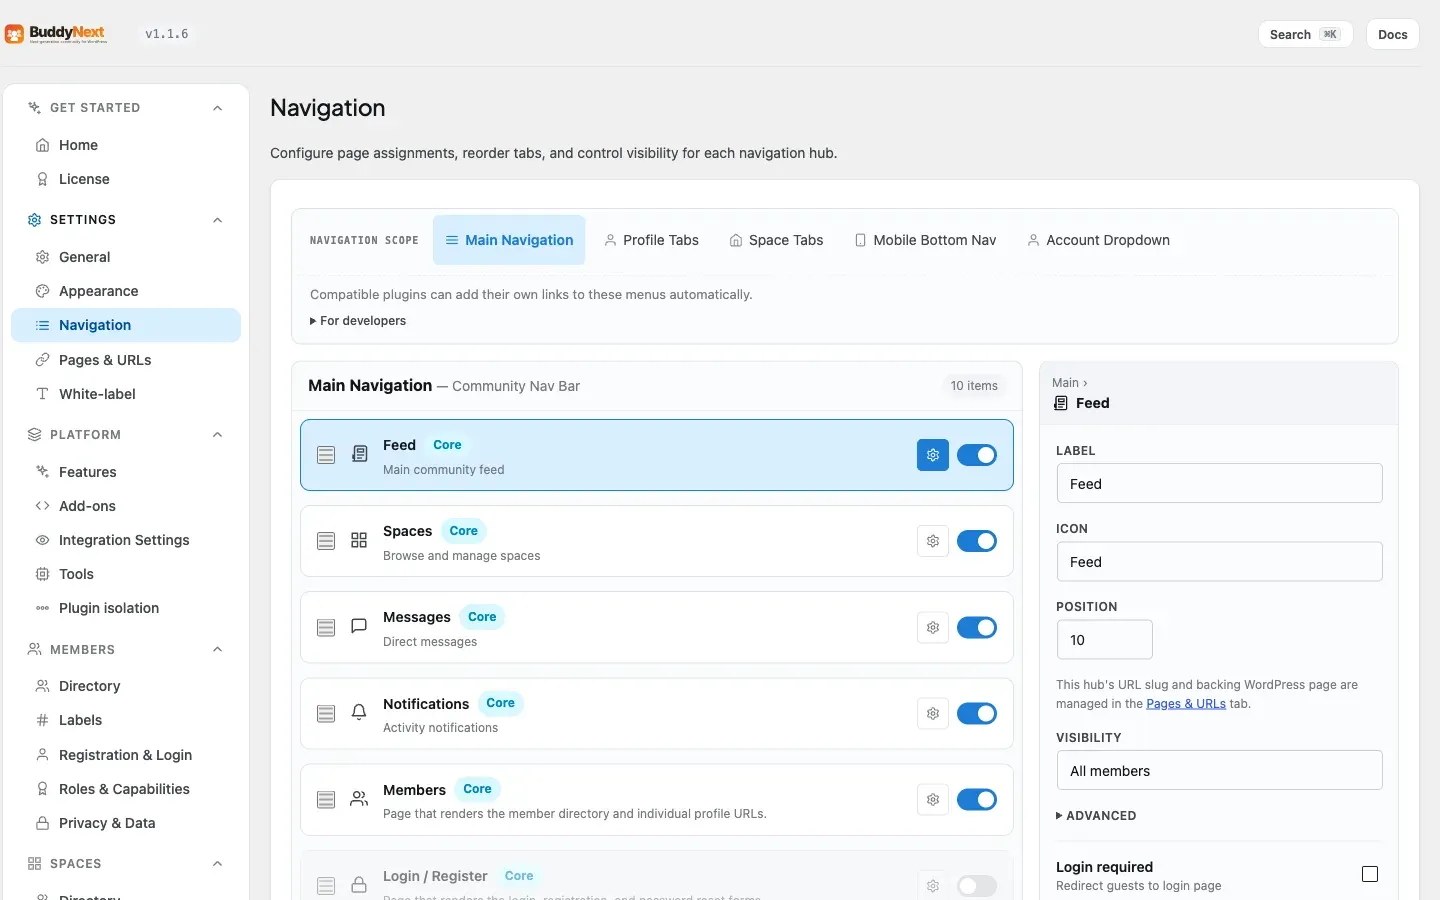
Section titled “Shaping the menus: Settings > Navigation”Settings > Navigation is where you shape every menu BuddyNext puts on the front end. It covers five surfaces, and each one works the same way:
| Surface | What it is |
|---|---|
| Main Navigation | The community nav bar. |
| Profile Tabs | The tabs on a member’s profile. |
| Space Tabs | The tabs on a space page. |
| Mobile Bottom Nav | The bar pinned to the bottom of the screen on phones. |
| Account Dropdown | The menu behind the avatar in the header. |
For each item on a surface you can:
- Hide or show it with the toggle on its row.
- Rename it - type the label your community actually uses.
- Reorder it by dragging its handle.
- Choose who sees it - all members, logged-in only, admins only, or anyone holding a capability you name.
Custom links can be added to the Main Navigation. The other four surfaces list the items that exist; they are extended in code rather than from this screen.
The Account Dropdown (1.0.8)
Section titled “The Account Dropdown (1.0.8)”The header avatar menu is new to this screen in 1.0.8. Previously it was the one navigation surface with no admin control at all - hiding Bookmarks, renaming a link, or reordering the menu meant writing code. It is now a scope like any other, so it hides, renames, reorders, and gates by capability from the same panel as everything else.
Links that companion plugins add to the menu (for example Courses, when Learnomy is connected) appear in the manager on their own, so you can hide or rename those too.
Note: Log Out is marked Fixed and is always shown. An owner who could hide it would strand every member on the site with no way to sign out, so it does not carry a hide toggle.
Reordering the mobile bottom bar (1.0.8)
Section titled “Reordering the mobile bottom bar (1.0.8)”The Mobile Bottom Nav is the five-slot bar members see on a phone. Its tabs can now be dragged into the order you want, the same as every other scope - previously it was the only scope whose rows looked reorderable but were not.
Two slots stay pinned and show a fixed handle instead of a draggable one:
- The centre Create button, which is only dead-centre while it has the same number of tabs on each side of it.
- Profile, the fixed last slot.
Everything else in the bar (Activity, Spaces, Notifications, and any tab a plugin adds) reorders freely around them, and the front-end bar honours the order you save.
Jump to any setting with the command palette
Section titled “Jump to any setting with the command palette”You do not have to remember which section a setting lives in. BuddyNext registers every one of its settings with WordPress core’s built-in Command Palette.
Press Cmd + K (Mac) or Ctrl + K (Windows / Linux) anywhere in wp-admin, start typing the name of the setting - for example “brand color”, “registration”, or “reactions” - and jump straight to it. This is the fastest way to reach a setting when you know what it is called but not where it lives.
Note: The Command Palette is part of WordPress itself, so the keyboard shortcut works on every admin screen, not only inside BuddyNext.
Where to go next
Section titled “Where to go next”Each section has its own deep-dive in this documentation:
- New install? Start with the Admin Setup Wizard - it walks you through the most important Settings, Members, Spaces, and Notifications choices in one flow.
- For who can join and how members are managed, see the Members documentation.
- For communities, categories, and membership rules, see the Spaces documentation.
- For reactions, notifications, email, and moderation, see the Activity Feed, Notifications, and Moderation Queue pages.
- For Pro sections (Realtime & Push, Campaigns, Moderation Tools, Monetization), see the BuddyNext Pro documentation. (Insights is a free feature - see Community Insights.)