

General Settings
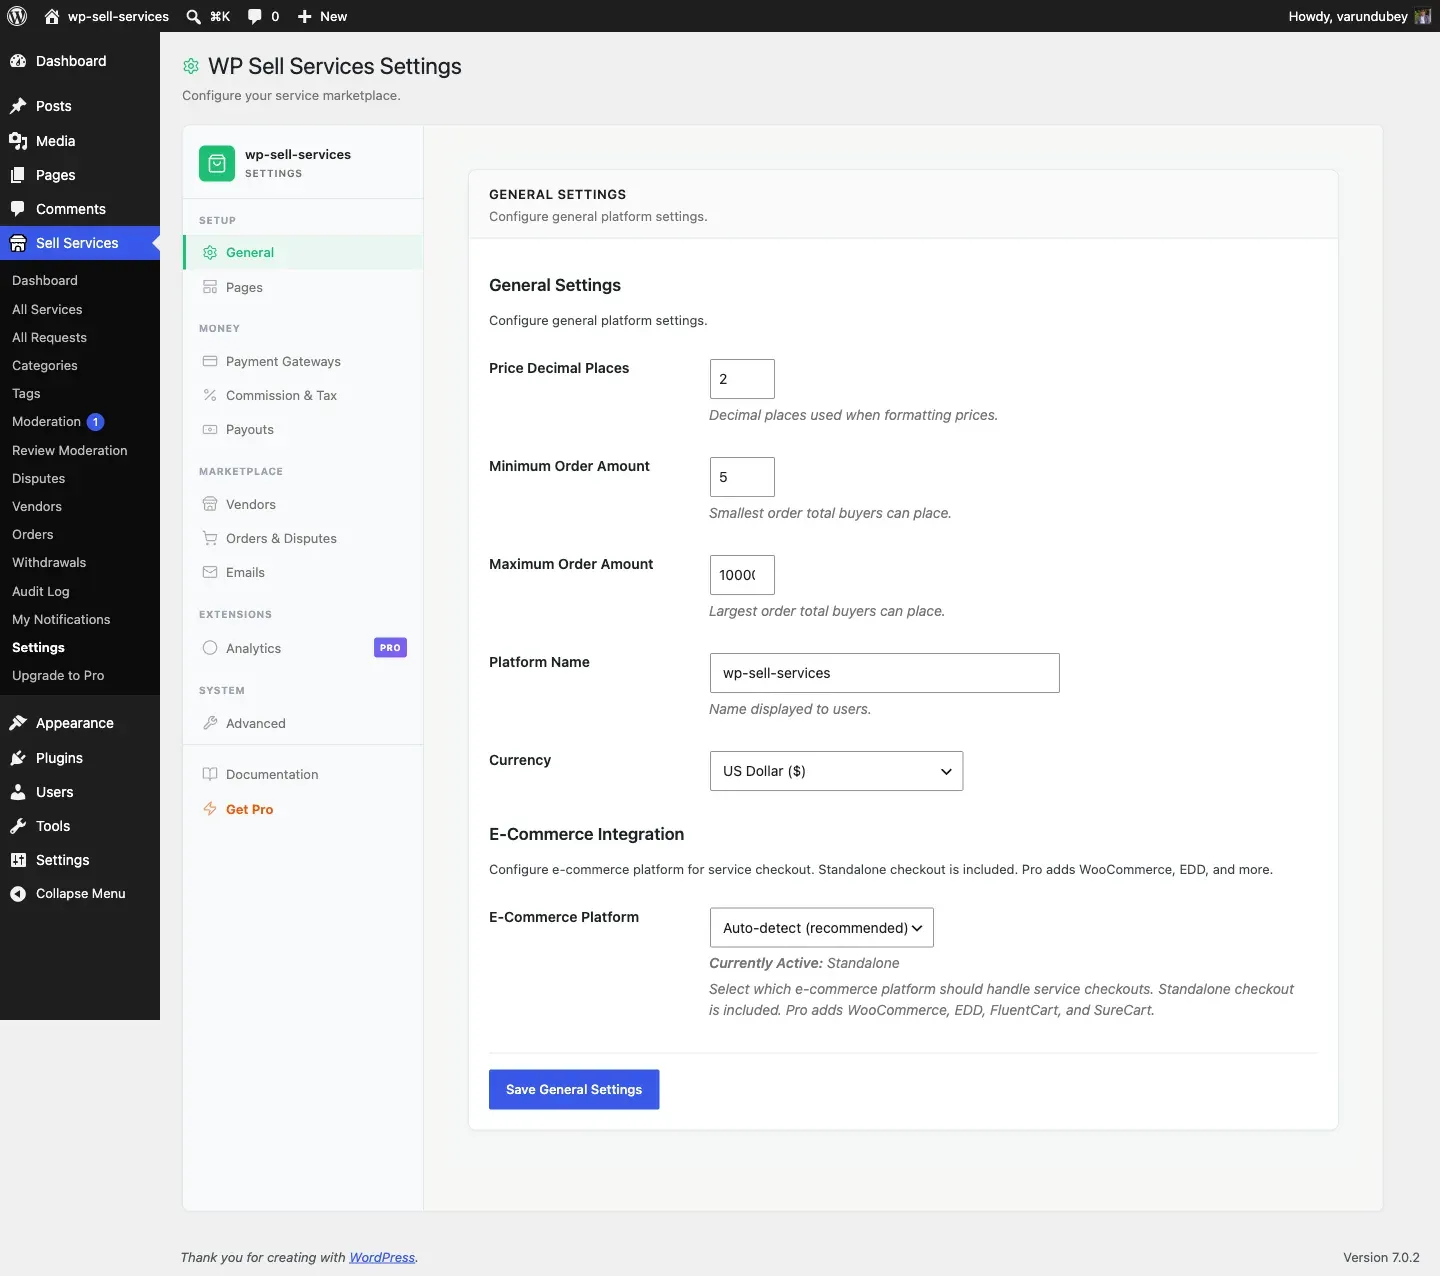
Configure the basics of your marketplace – your platform name, currency, and which e-commerce system powers your checkout.
Platform Name
Section titled “Platform Name”Give your marketplace a custom name that appears throughout the platform: in emails, page headers, notifications, and payment receipts.
- Go to Sell Services > Settings > General
- Enter your marketplace name in the Platform Name field
- Click Save Changes
Default: Your WordPress site name is used if no custom name is set.
Examples: “Creative Hub Marketplace”, “Expert Services Network”, “DesignPro Market”
Currency
Section titled “Currency”Choose the currency for all transactions on your marketplace. This affects how prices are displayed on services, how orders are totaled, and how vendor earnings are calculated.
Supported Currencies
Section titled “Supported Currencies”| Currency | Symbol | Code |
|---|---|---|
| US Dollar | $ | USD |
| Euro | EUR | EUR |
| British Pound | GBP | GBP |
| Canadian Dollar | C$ | CAD |
| Australian Dollar | A$ | AUD |
| Indian Rupee | INR | INR |
| Japanese Yen | JPY | JPY |
| Chinese Yuan | CNY | CNY |
| Brazilian Real | R$ | BRL |
| Mexican Peso | MXN | MXN |
Setting Your Currency
Section titled “Setting Your Currency”- Go to General Settings
- Select your currency from the dropdown
- Click Save Changes
Default: USD (US Dollar)
Your entire marketplace operates in one currency. All service prices, order totals, and vendor earnings use the same currency. Payment gateways handle any conversion on their end if a buyer pays from a different region.
Tip: Set your currency during initial setup. Changing it later can create confusion since existing service prices stay at their original numbers.
[PRO] Multi-currency support is available in the Pro version – automatic currency detection by buyer location, live exchange rates, and localized price displays.
E-Commerce Platform
Section titled “E-Commerce Platform”Choose which system handles your marketplace checkout and payments.
Available Options
Section titled “Available Options”| Platform | Availability |
|---|---|
| Standalone (built-in checkout) | Free – no extra plugins needed |
| WooCommerce | [PRO] |
| Easy Digital Downloads | [PRO] |
| FluentCart | [PRO] |
| SureCart | [PRO] |
Auto-Detect (Recommended)
Section titled “Auto-Detect (Recommended)”The default setting automatically detects which platform is available and uses it. For most sites, this is the best choice.
- If only the free plugin is active, it uses the built-in Standalone checkout
- If Pro is active and WooCommerce (or another supported platform) is installed, it uses that platform
Standalone Mode (Free)
Section titled “Standalone Mode (Free)”The free version includes a complete built-in checkout system with Stripe, PayPal, and Offline payment support. No WooCommerce or any other e-commerce plugin is required. This is the simplest setup – perfect if you want a clean, lightweight marketplace.
WooCommerce and Other Platforms [PRO]
Section titled “WooCommerce and Other Platforms [PRO]”The Pro version lets you plug into WooCommerce, Easy Digital Downloads, FluentCart, or SureCart. This is useful if you already have an online store and want your marketplace orders to flow through the same checkout and payment system.
Switching Platforms
Section titled “Switching Platforms”You can change platforms at any time under Settings > General. Keep in mind:
- Existing orders stay with the original platform
- New orders use the new platform
- Payment gateway settings may need reconfiguration
- Test the checkout flow on a staging site before switching on a live marketplace
Troubleshooting
Section titled “Troubleshooting”Platform name not updating everywhere? Clear all caches (site, theme, hosting, CDN) after saving. Some email templates may cache the old name.
Currency symbol not displaying? Check that your database uses UTF-8 encoding and your theme supports special characters.
E-commerce platform not detected? Make sure the platform plugin (e.g., WooCommerce) is installed and activated. Refresh the WP Sell Services settings page after activating it.